Acer Aspire V-Nitro VN7-793G Heating and Thermal Heatsink Issue
I’ve owned my Acer Aspire V-Nitro VN-793G-717 Black Edition since early 2017 and have been happy with it. It still runs all apps I need and does what I need it to do.
I do Photoshop, Premiere, After Effects, Blender and design and edits, light gaming – Counter Strike 1.6, CS GO, Just Cause 3, Age of Empires II Definitive Edition, etc.
I had no issues, except the overheating when gaming or overloading the computer.
Overheating was my only complaint.
Over the years I did some upgrades:
- Main Drive – SAMSUNG 970 EVO Plus SSD 500GB NVMe M.2
- Second (data drive) – Samsung SSD 860 EVO 1TB M.2 SATA in SATA III enclosure
- Wi-Fi 6 module upgrade – Killer Wi-Fi 6 AX1650 Module – Dual Band, 2×2 Wi-Fi 6/11AX, Bluetooth 5.0, M.2/NGFF (Gig+)
- New battery – year 3 and year 5 of ownership
- RAM Upgrade to max 32GB (2 x 16GB Micron Tech. 16ATF2G64HZ-2G3H1 DDR4-2400 / PC4-19200).
Recently I started hearing rattling noise from my GPU fan of my laptop and decided to get a new one and change it.
When I disassembled the laptop and removed the heatsink I saw that the thermal pads were baked and flaking. I started removing the pads and saw that under each thermal pad there’s thick plastic transparent foil that looked like double sided scotch-tape, but thicker separating the thermal pad and the brass heatsink.
I was shocked that Acer did this! That plastic is technically preventing the heat transfer and dissipation from the thermal pad to the brass heat pipe pads.
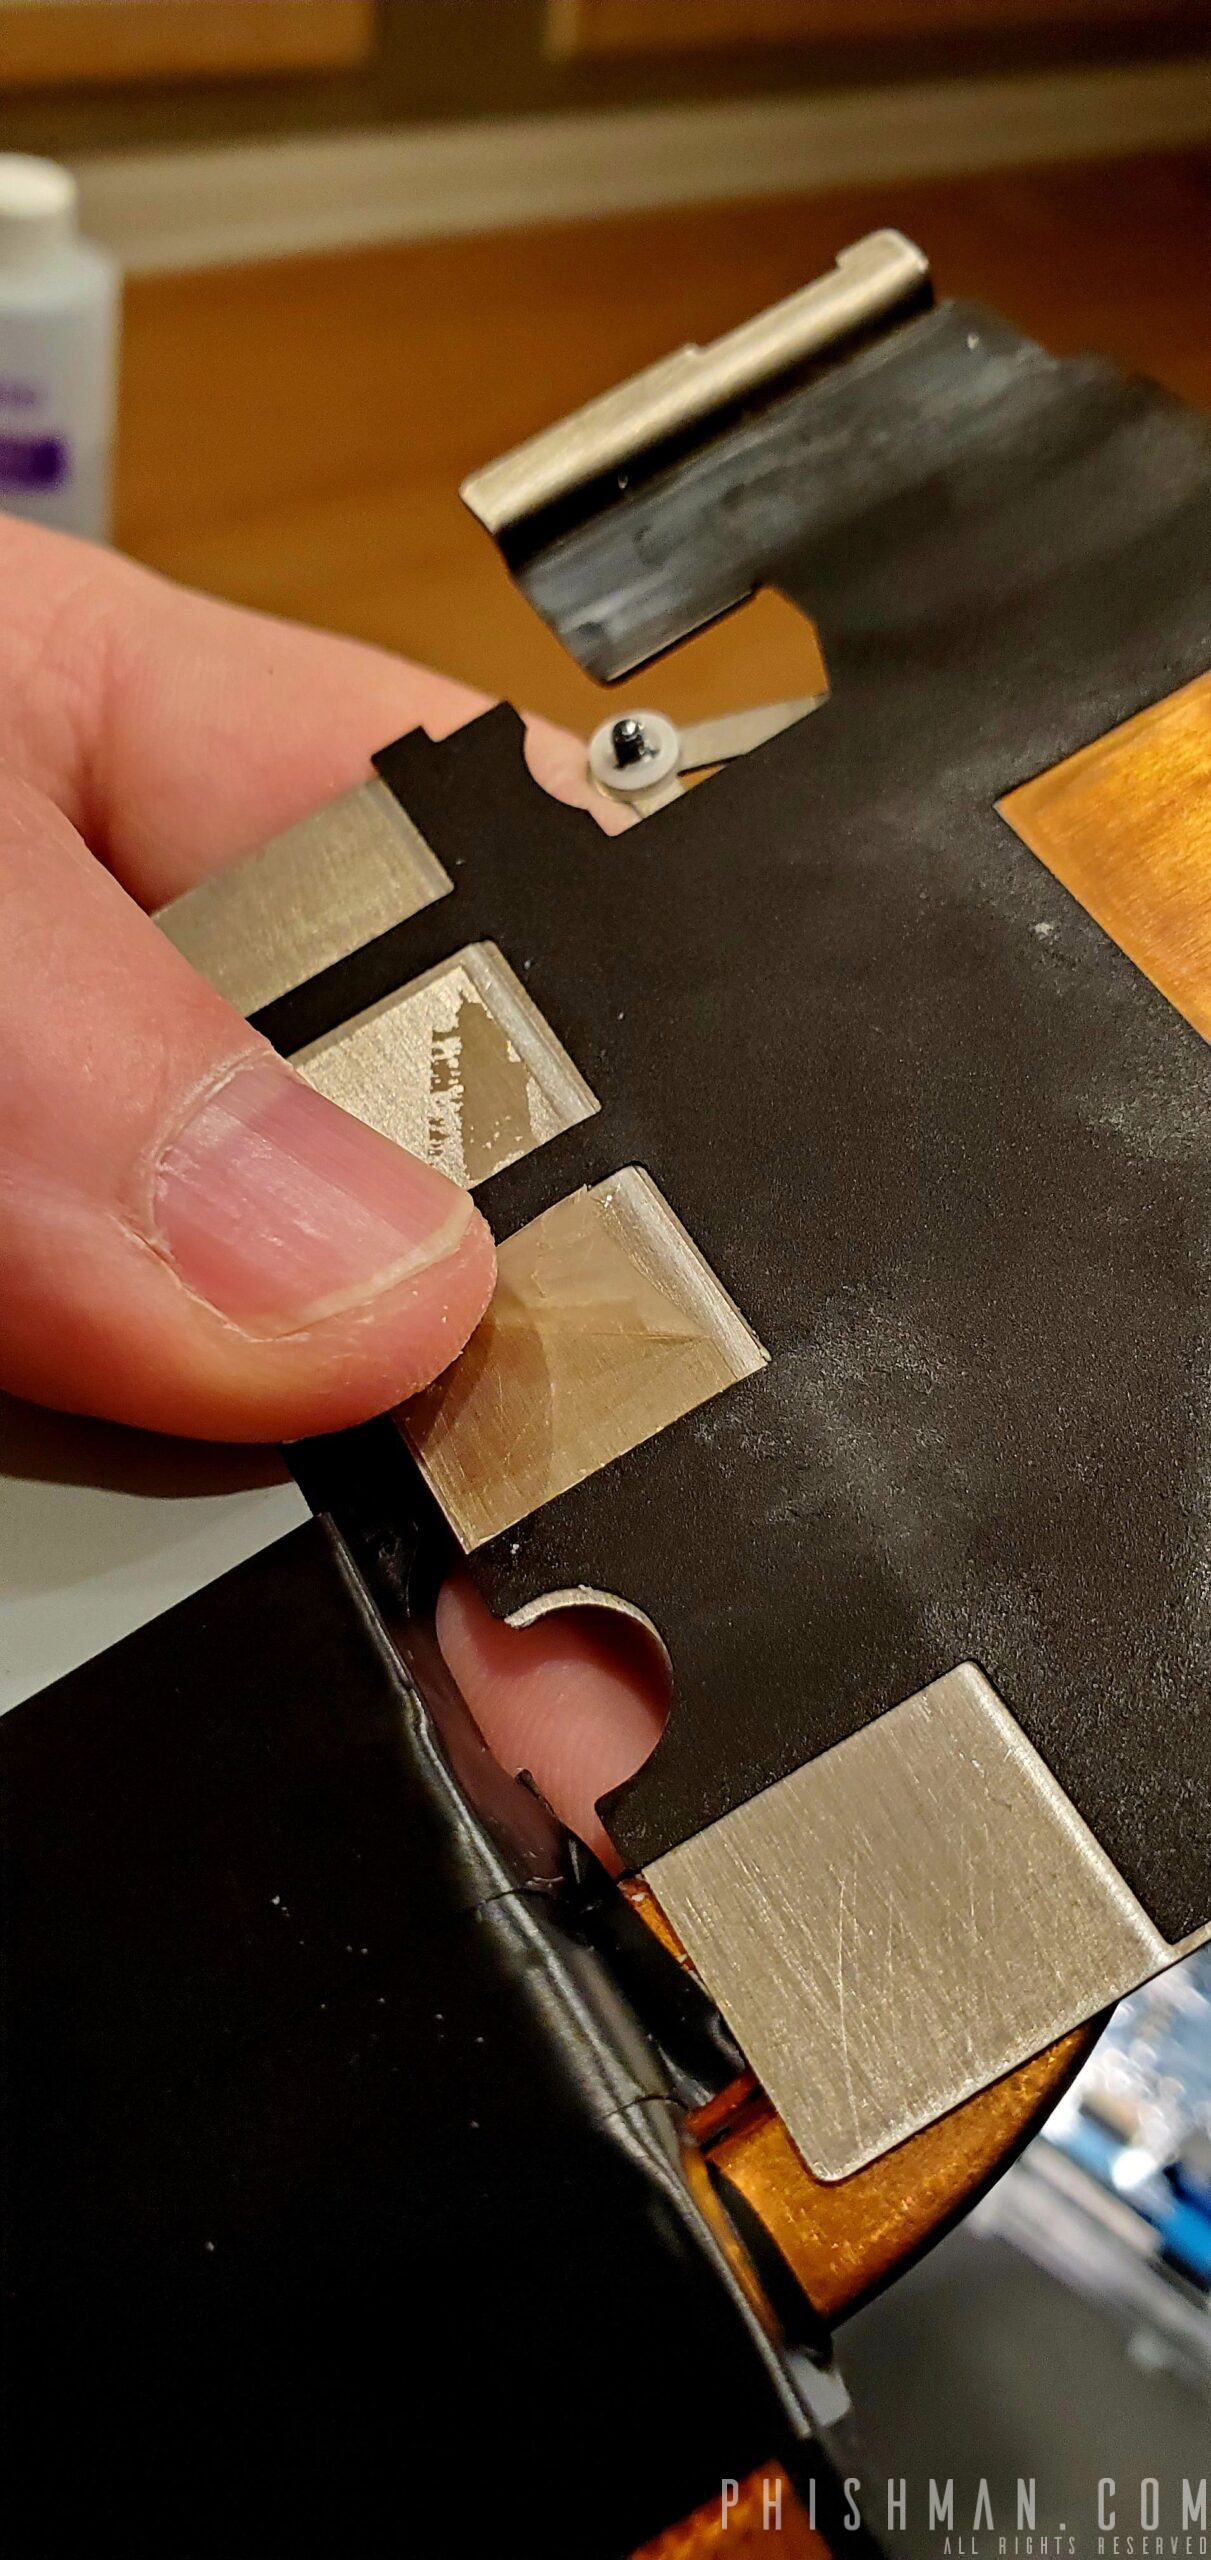
The plastic layer between the pad and the heatsink.
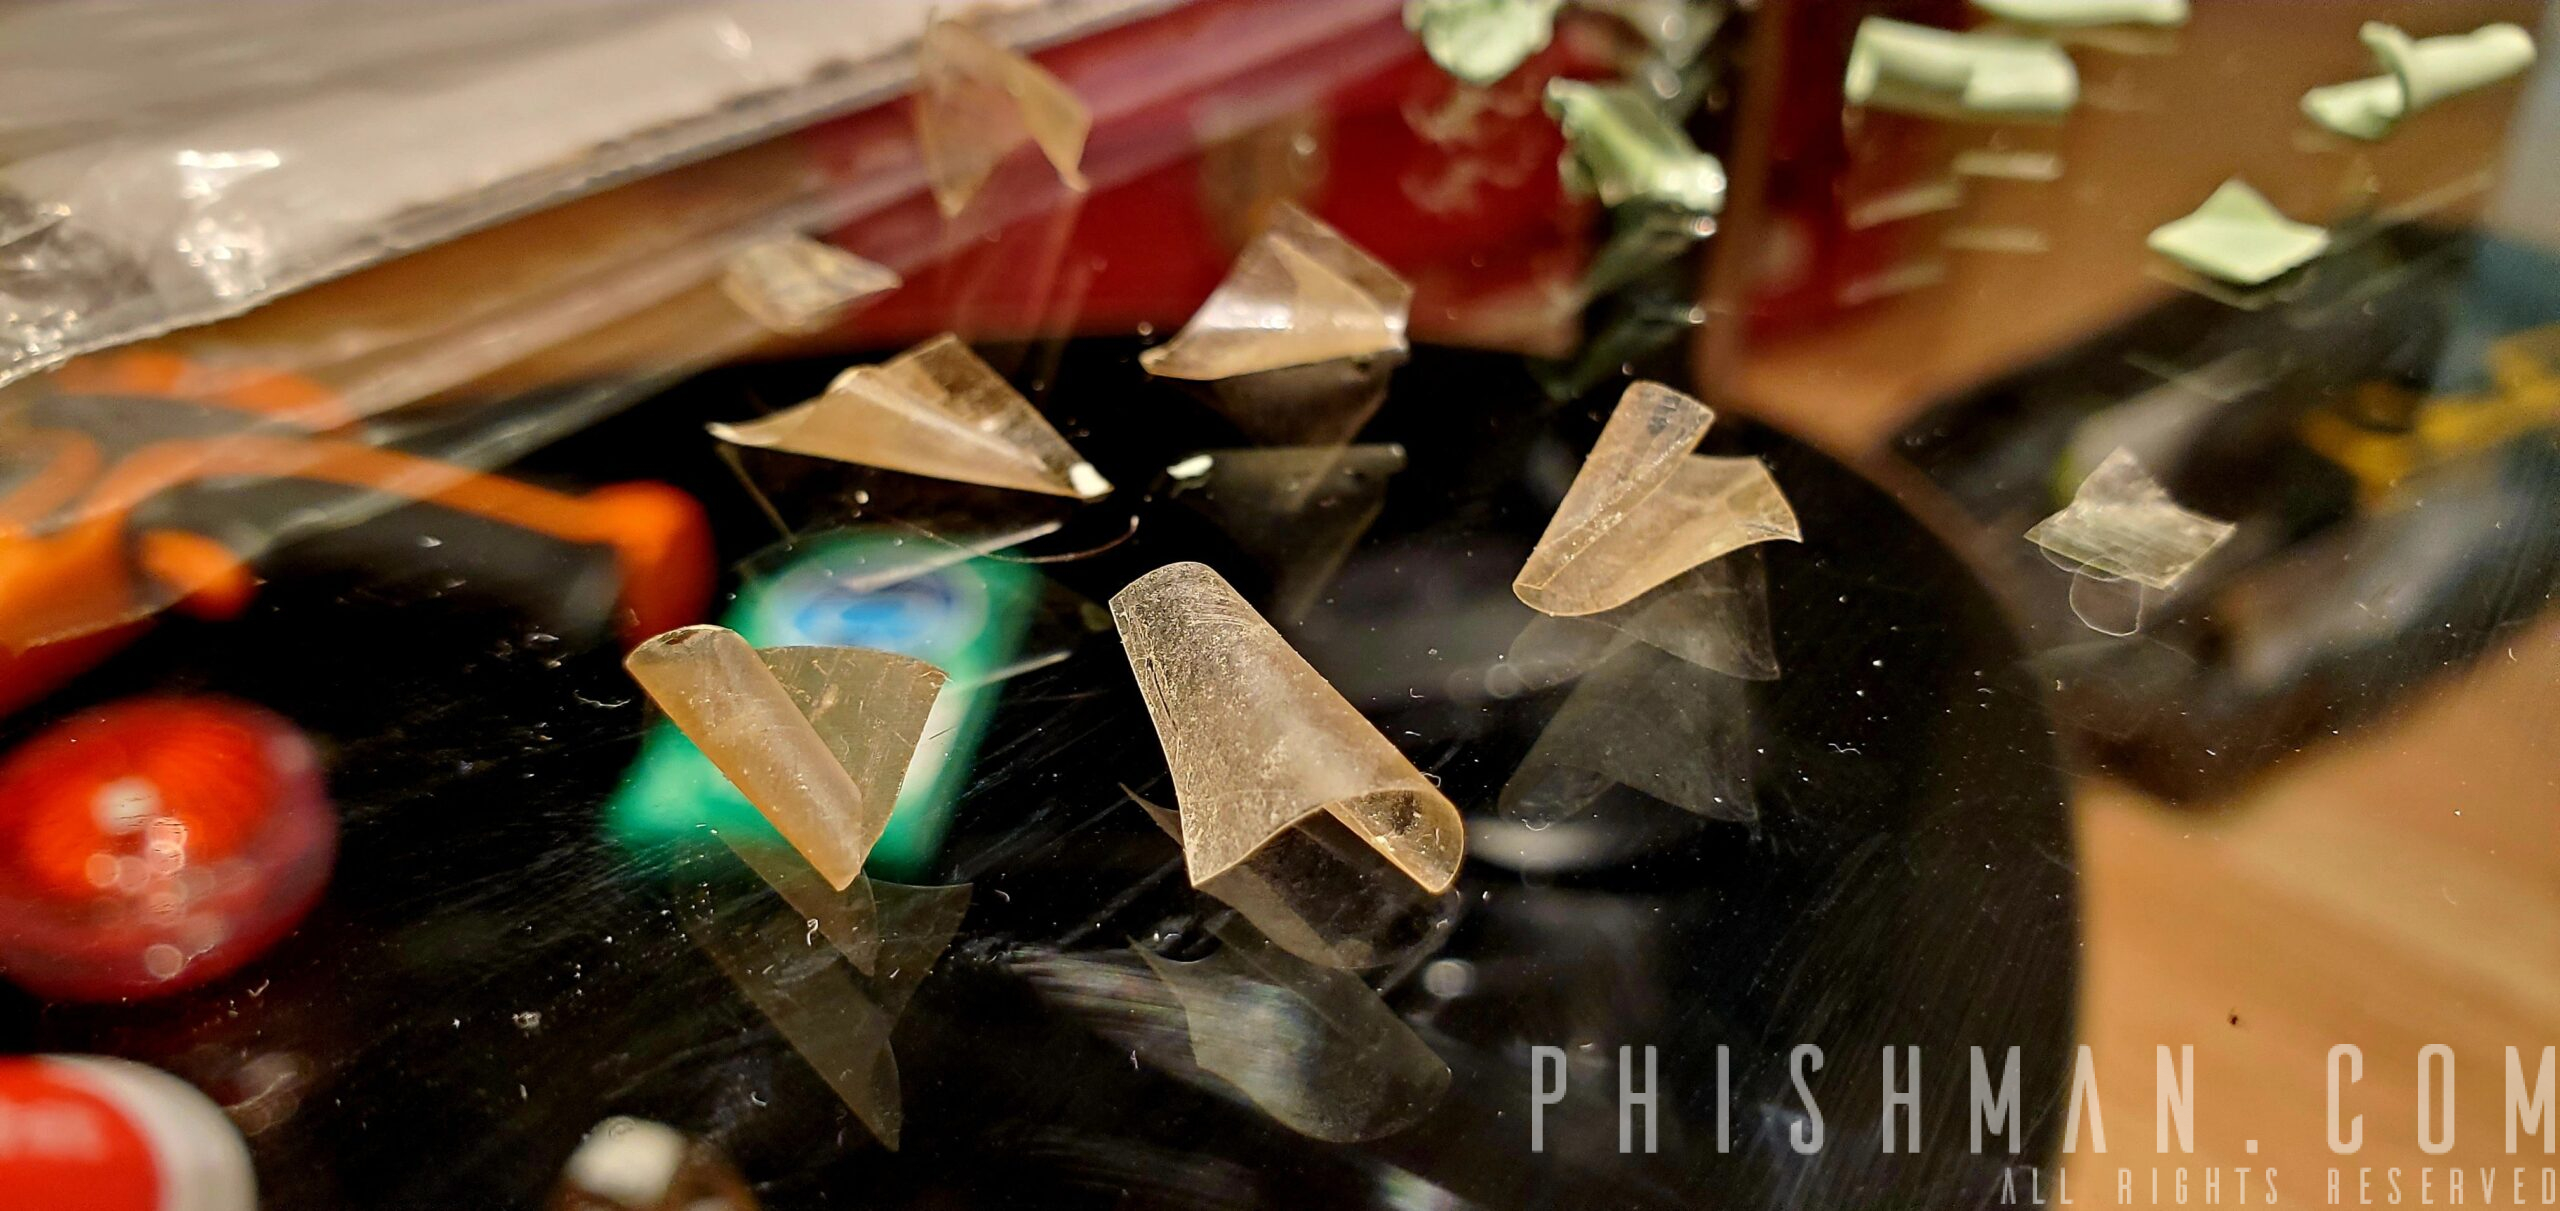
This is what the thick sticky tape-like plastic looks like.
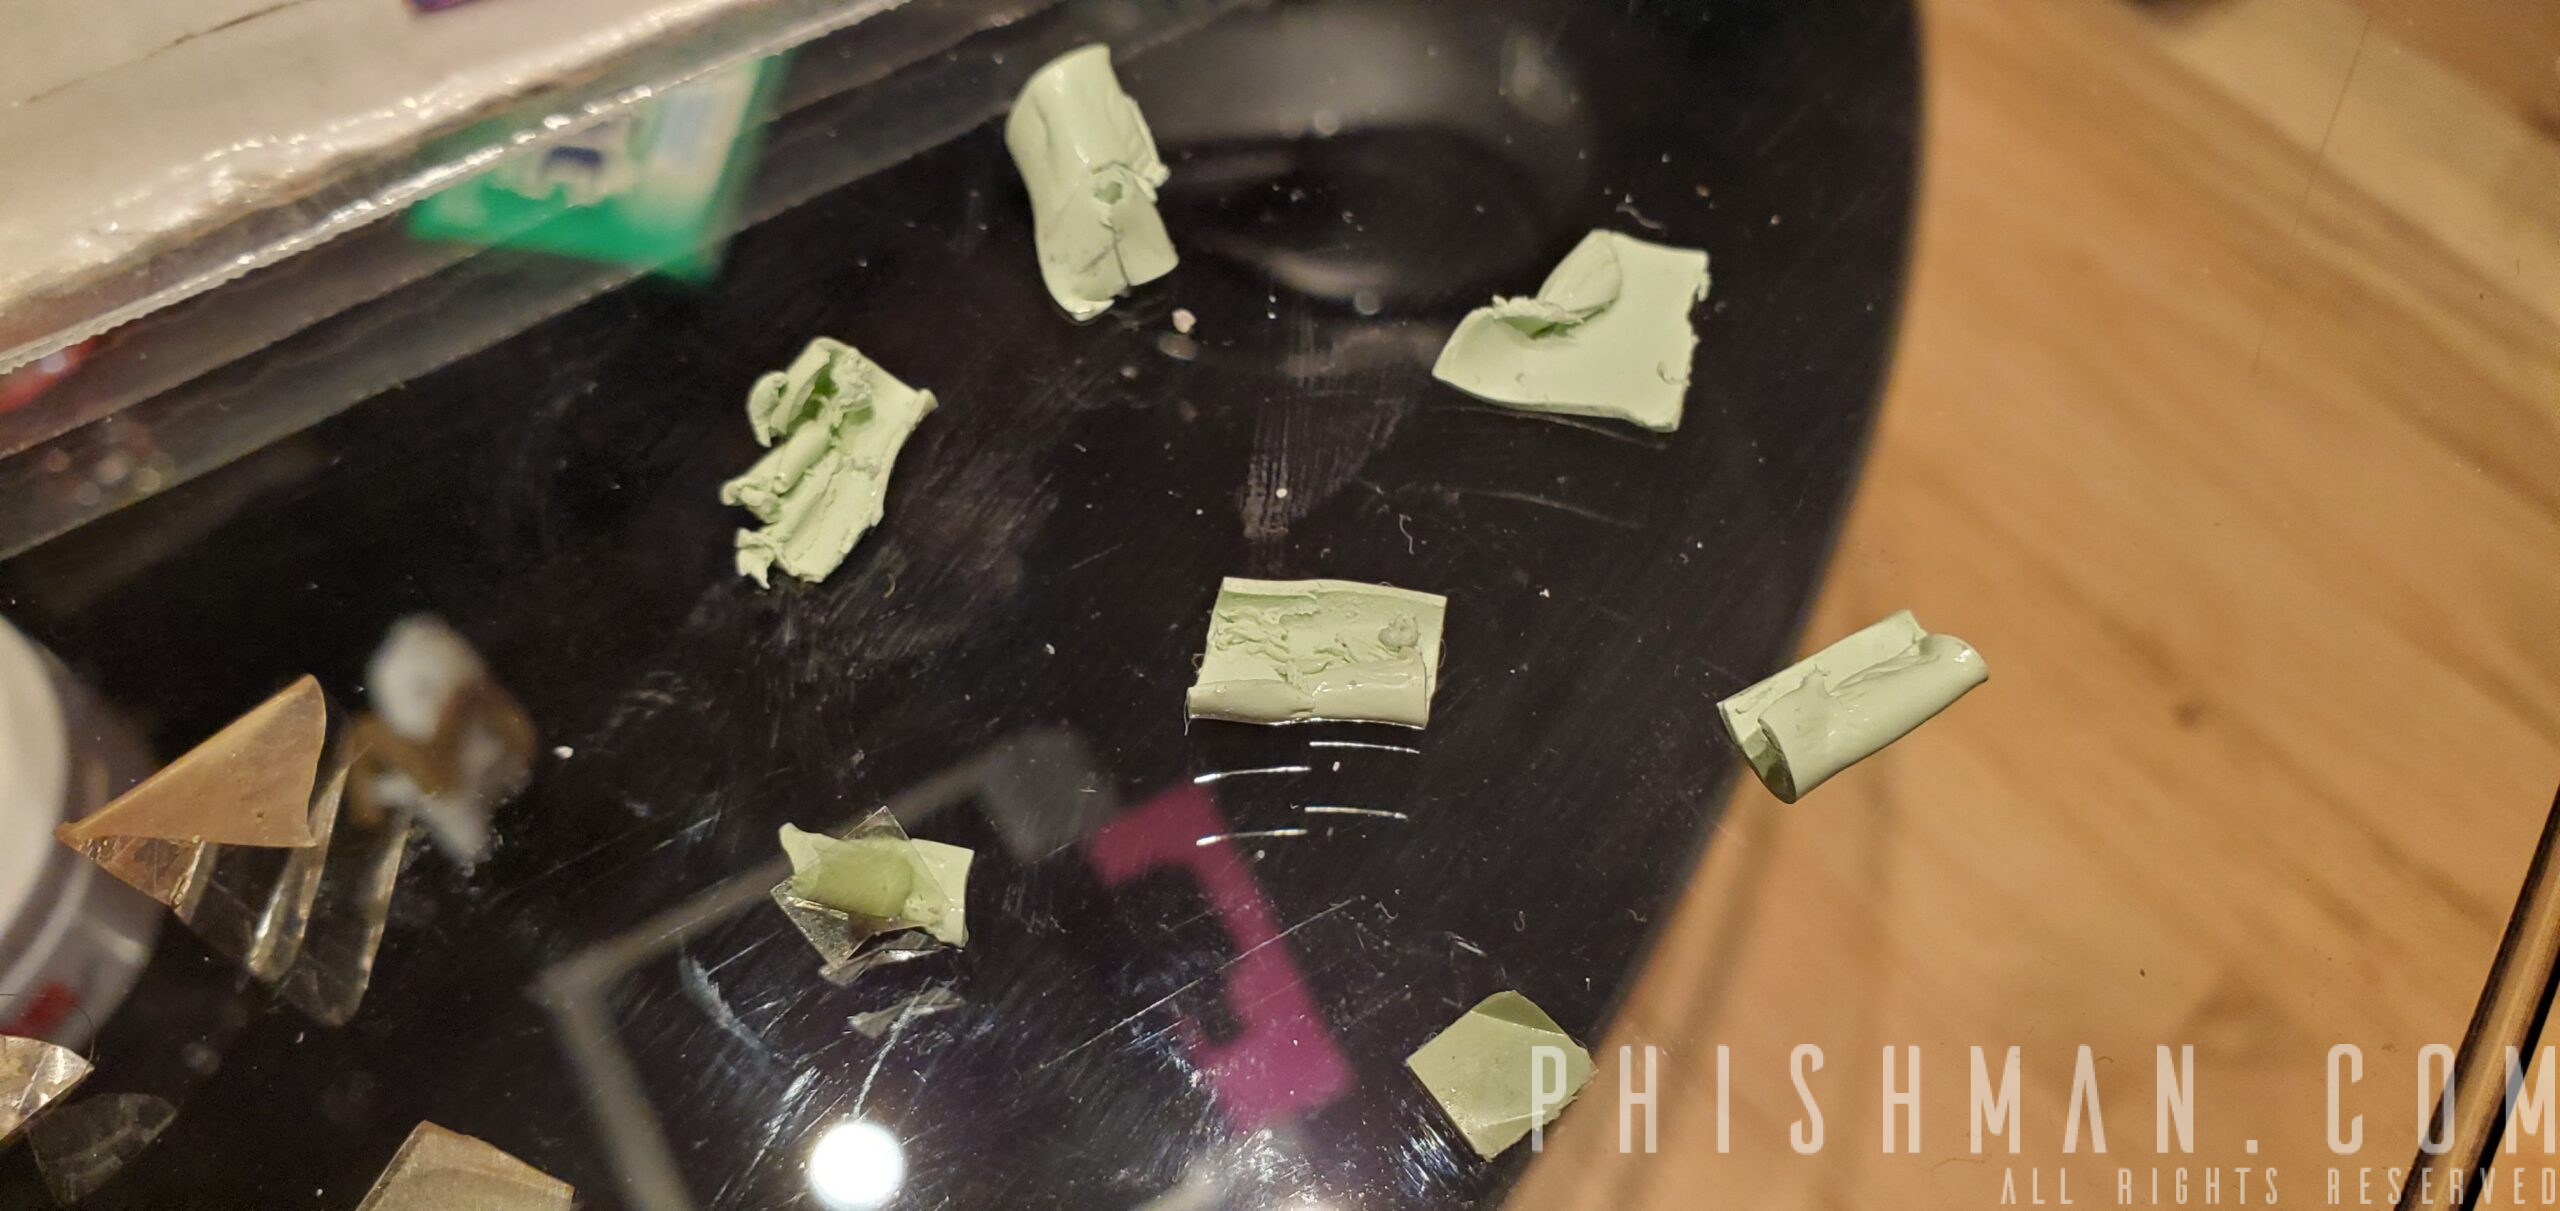
Baked VRM thermal pads.
VRM thermal pads and the plastic tape that was between the heatsink and the thermal pad.
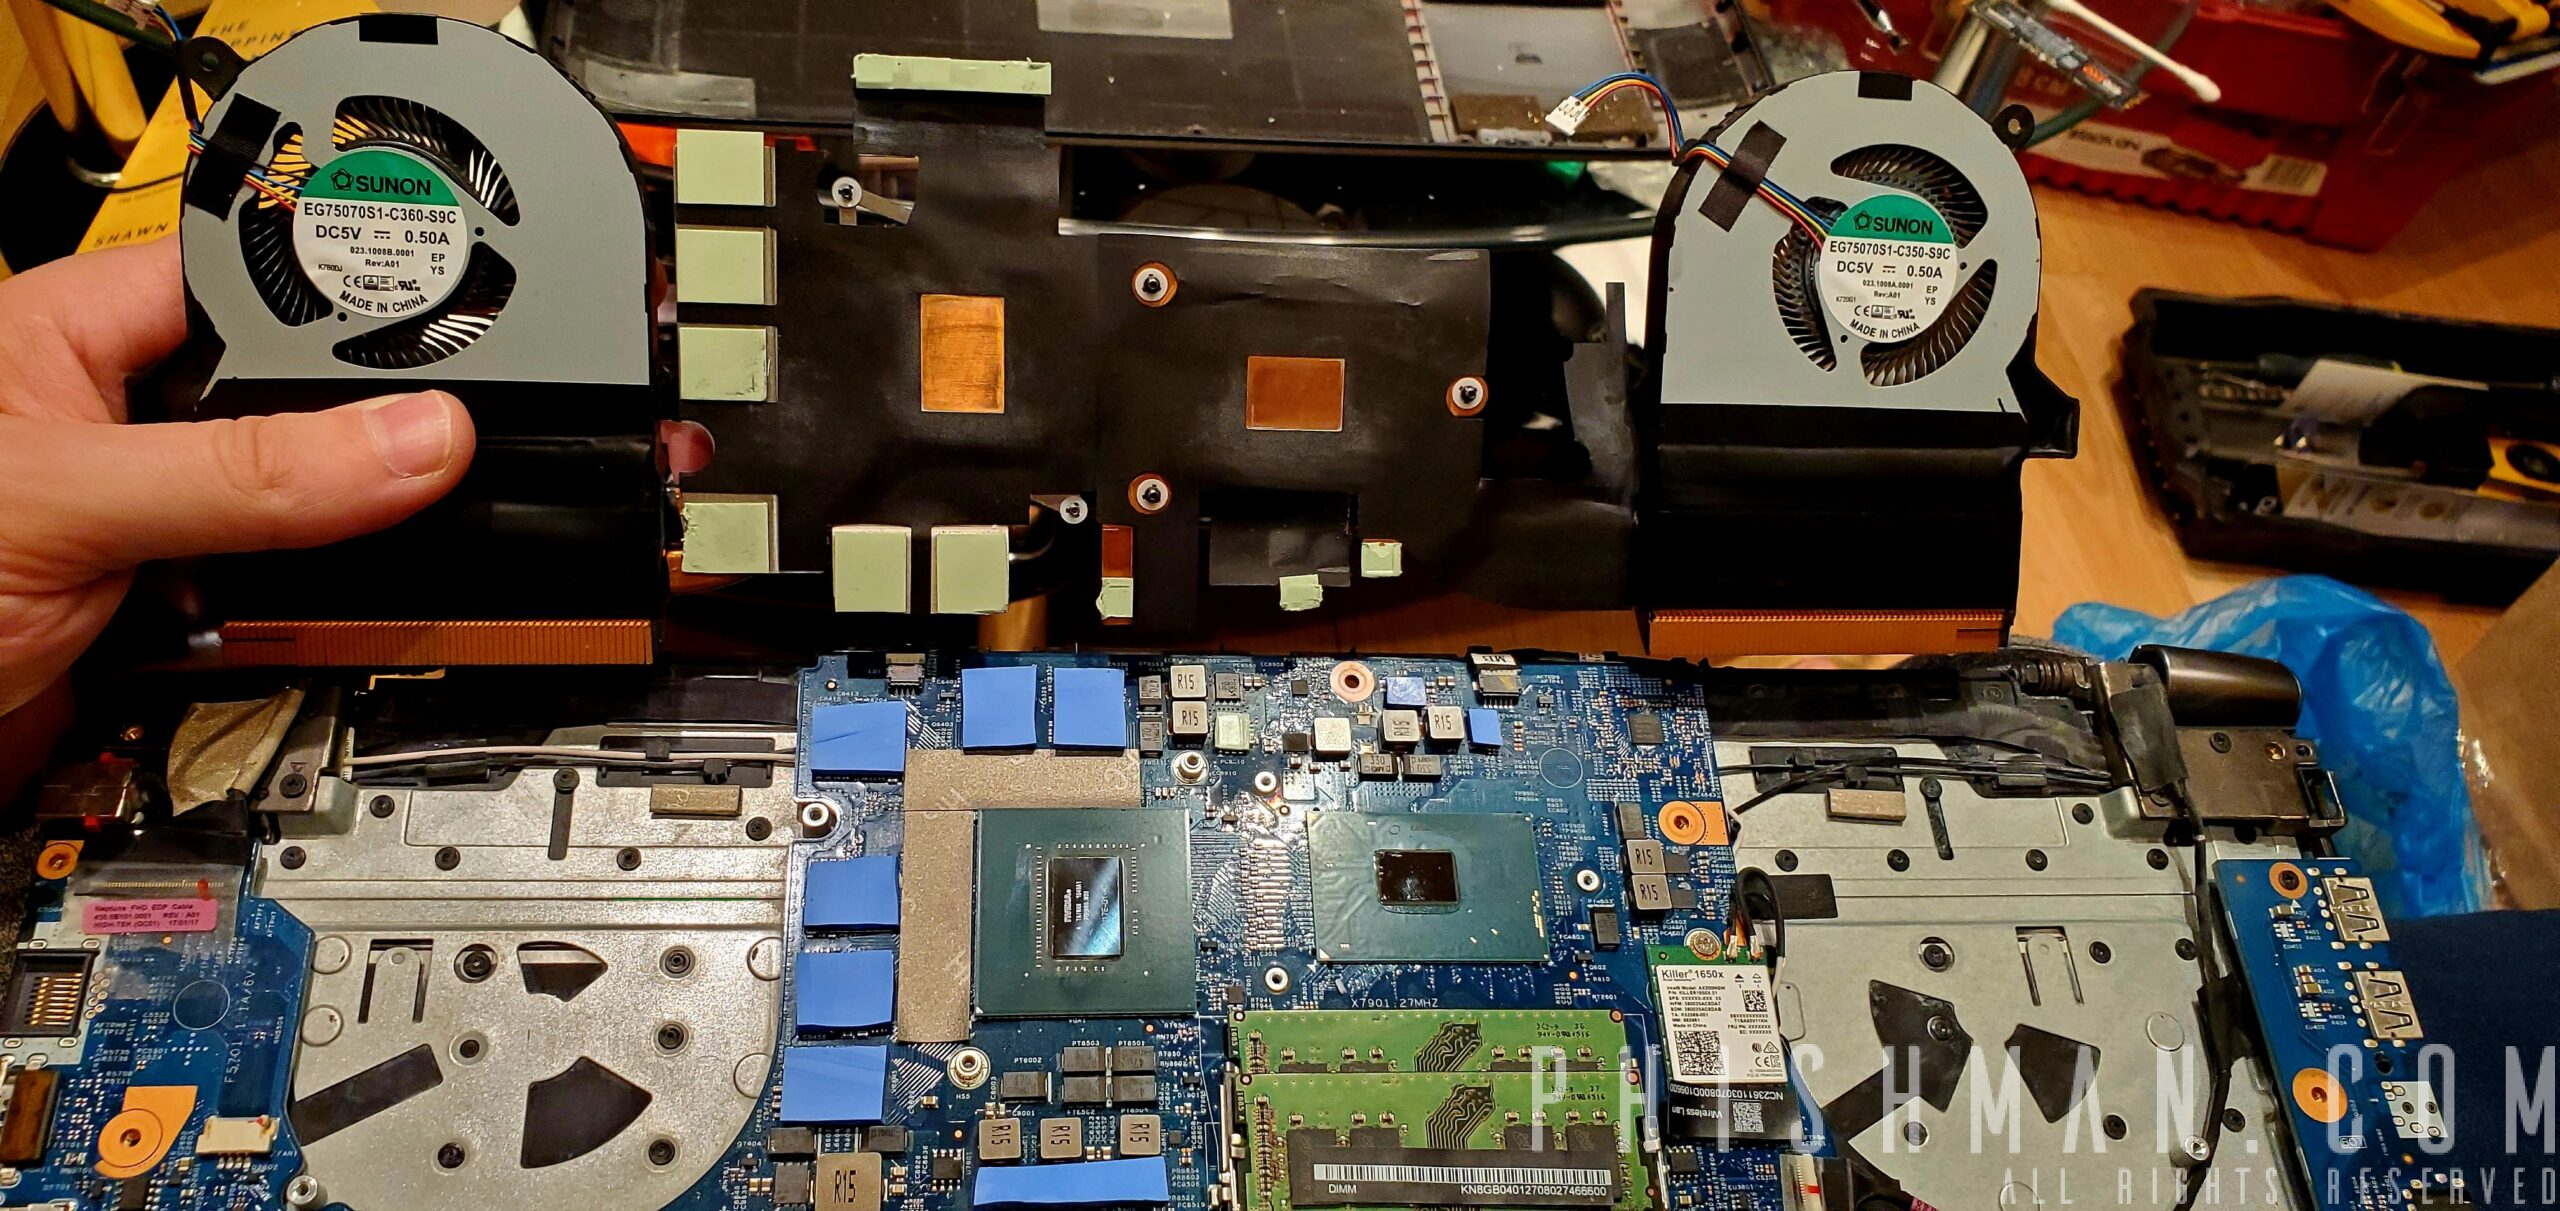
The replaced thermal pads before/after. Blue pads are the new thermal pads.
Yes, all that thick plastic was your thermal solution! Mind-blowing, Acer!
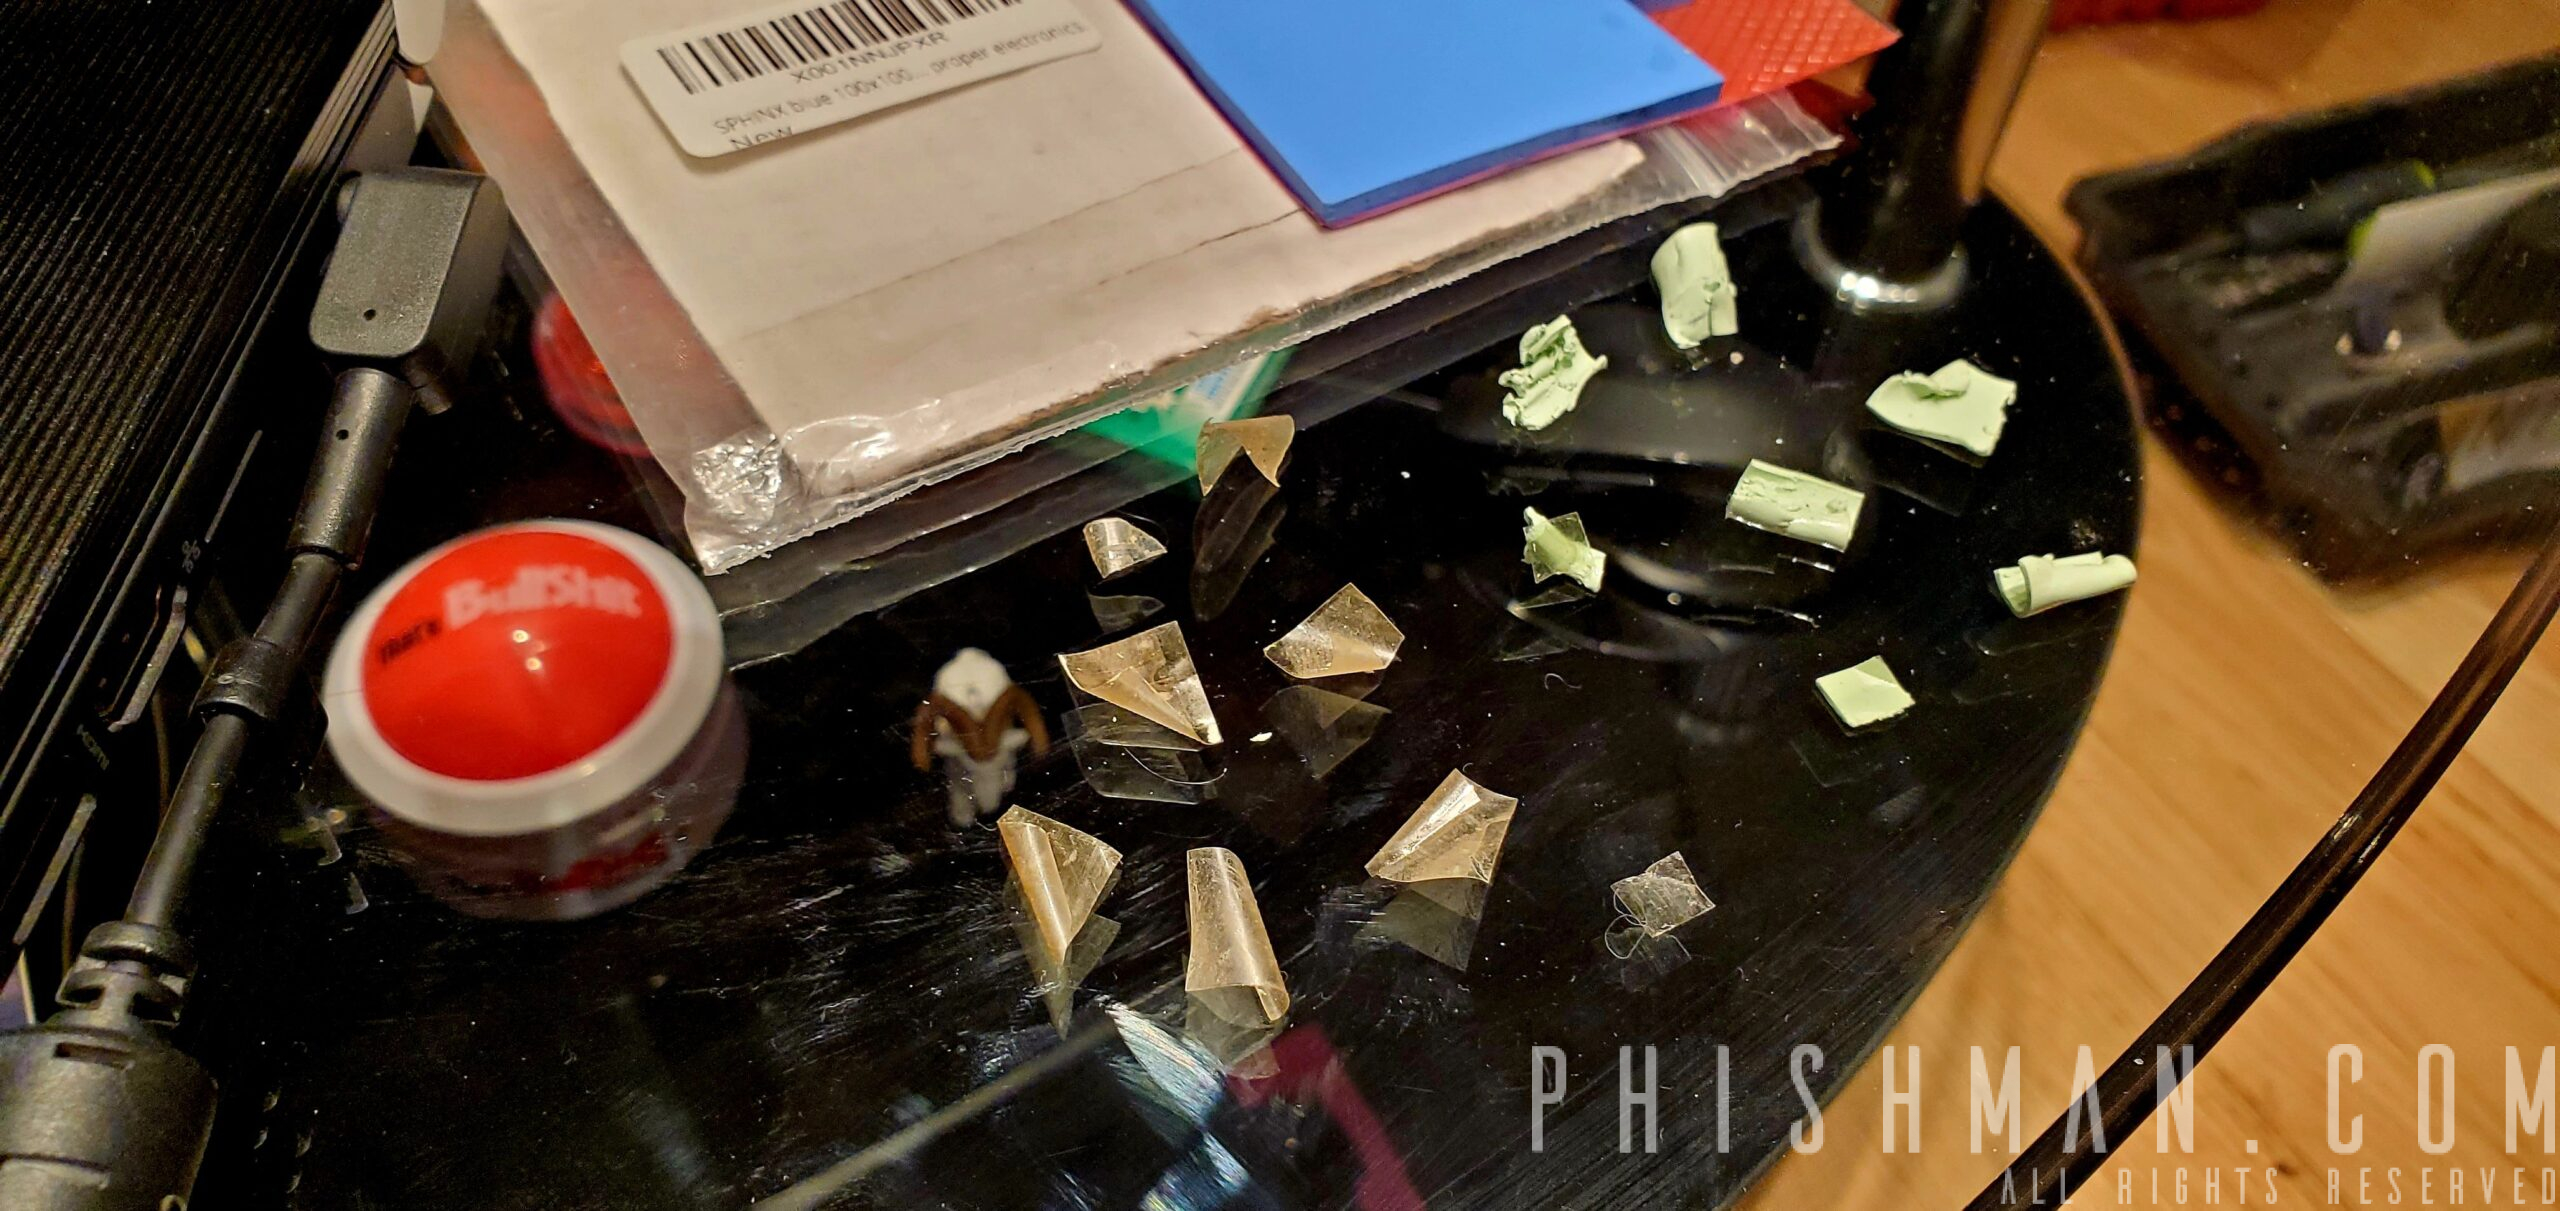
After removing all the useless OEM thermal pads I added the Sphinx Blue thermal pad that I got from Amazon.
I cut and sliced with a knife the thermal pad pieces that I needed and added to the VRMs.
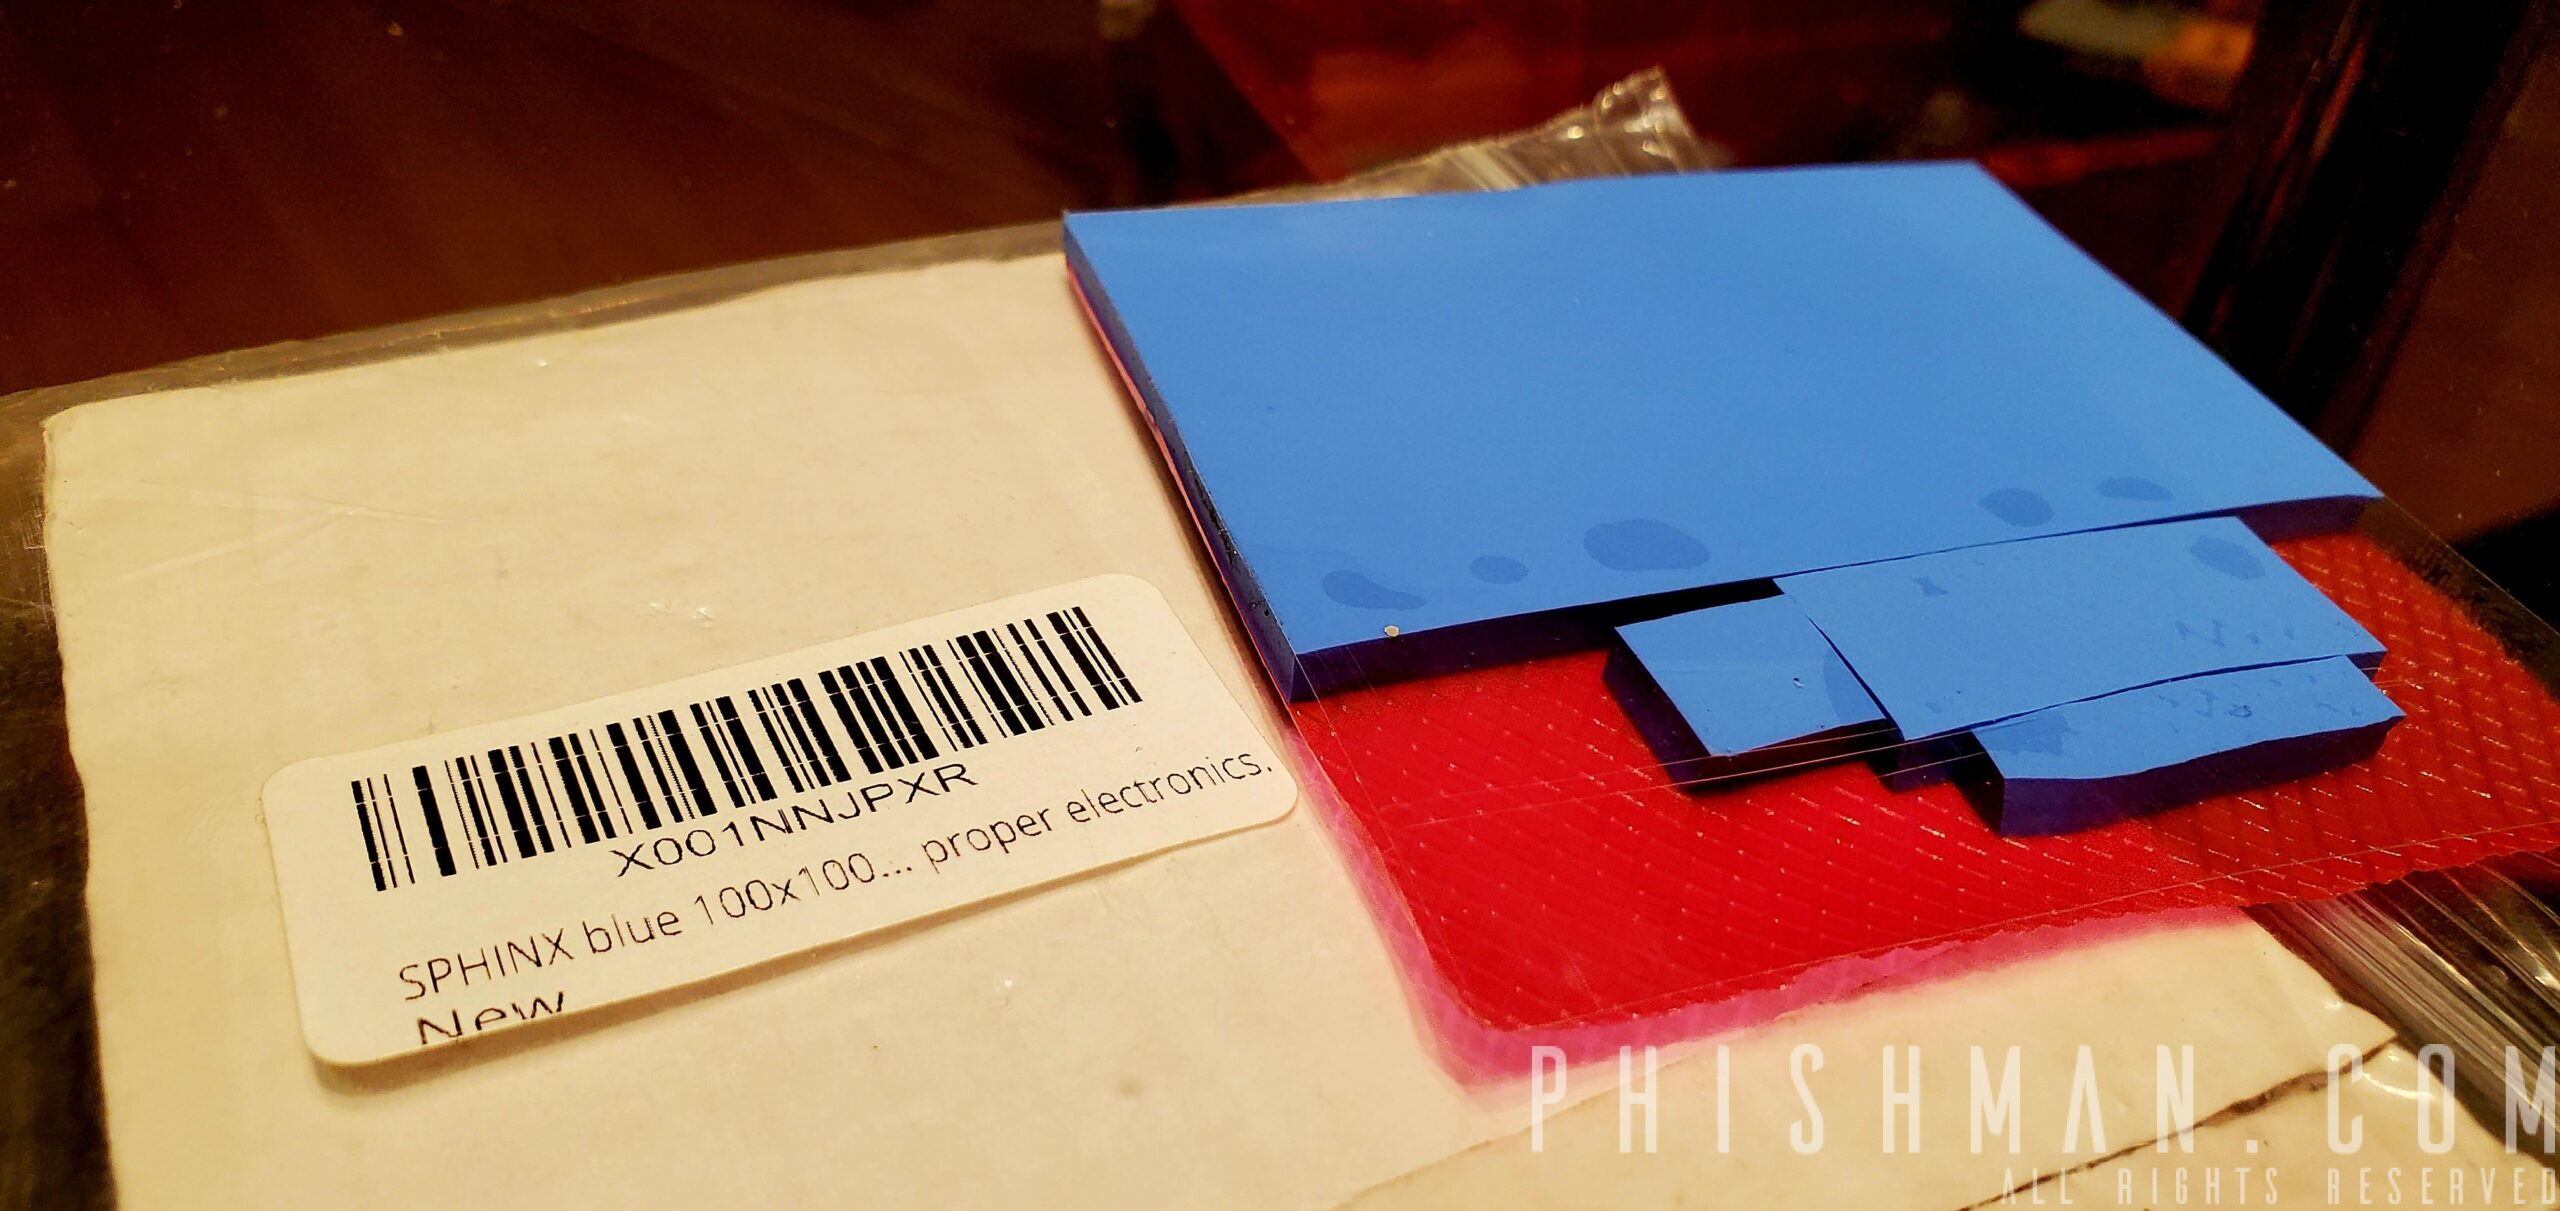
Sphinx Blue thermal pad.
The outflow air ducts were filled with dust and other particles. Required a good cleaning. I had to remove the black plastic tape that insulates and connects the fans to the heatsink radiators in the back.
That allowed me to do clean inside the fans and the ducts.
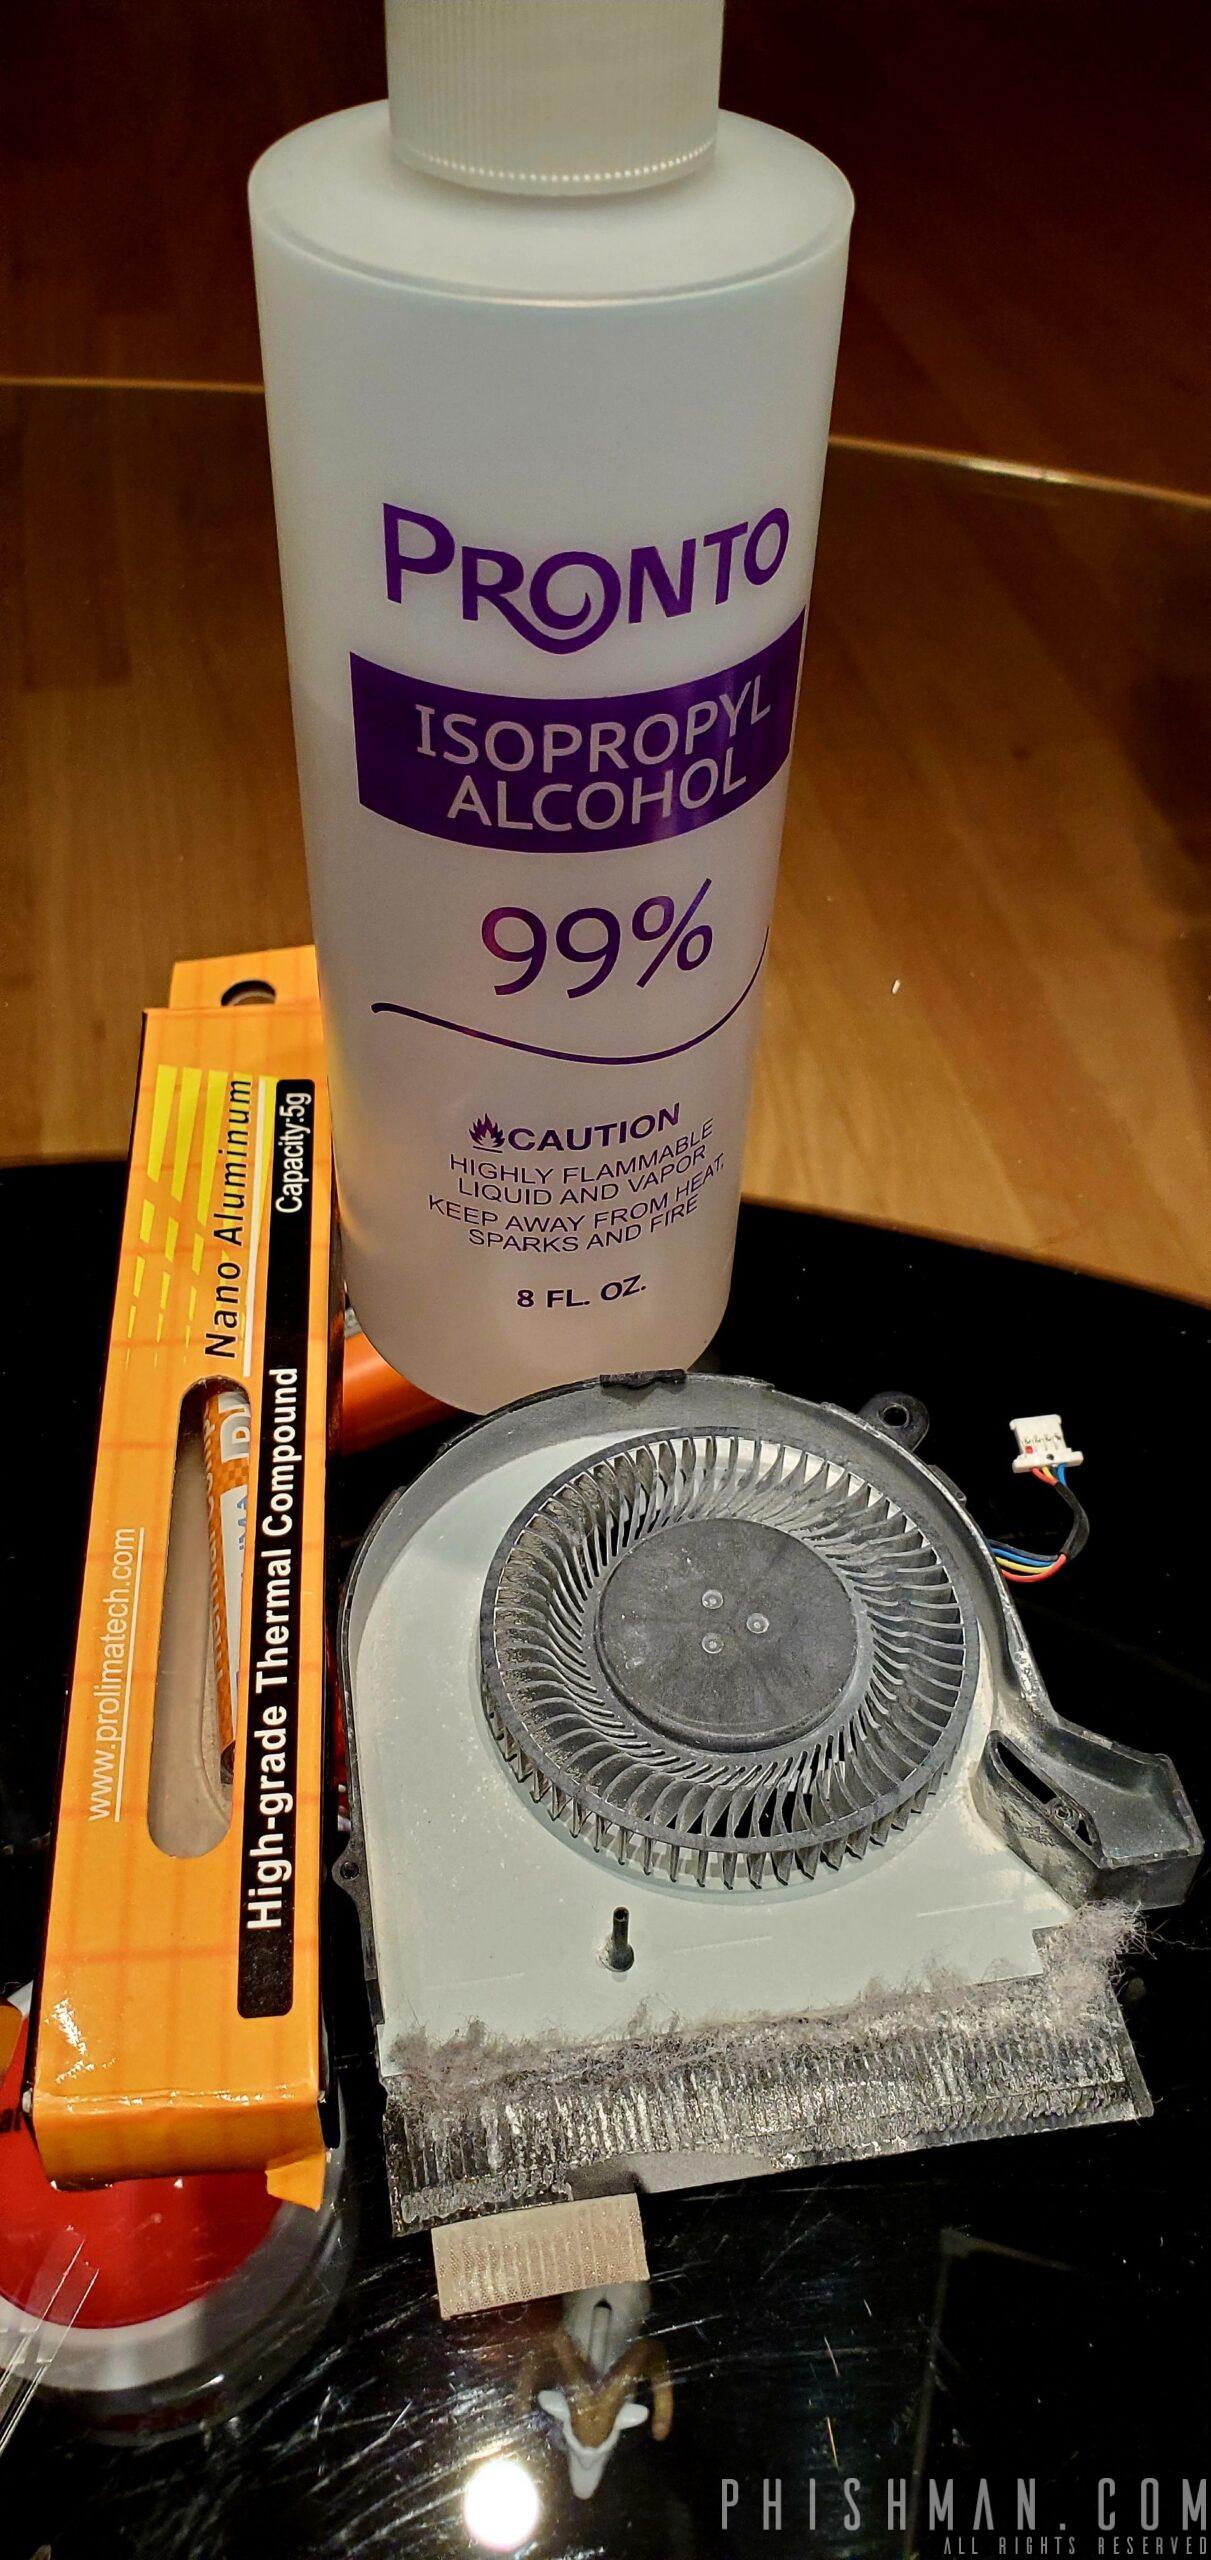
99% Isopropyl Alcohol Prolimatech Nano Aluminum Thermal Paste
I use close to 100% isopropyl alcohol to clean the old thermal paste solution and any dust I can’t clean with a cloth.
The thermal paste I use is Prolimatech Pk-3 Nano Aluminum Thermal Compound with Thermal Conductivity of 11.2 W/m-°C.
I’ve used Thermalright TF8 Thermal Compound Paste 13.8 W/mK, Carbon Based High Performance, Heatsink Paste and the ARCTIC MX-4 – Thermal Compound Paste, Carbon Based High Performance, Heatsink Paste.
I always come back to the Prolimatech as I see best results with that thermal compound.
The Thermalright was nowhere near the Prolimatech compound. CPU and GPU had 5-10 degrees higher difference under heavy load.
ARCTIC MX-4 performs good, but nowhere near the Prolimatech. I think it always has been overhyped product.
When I bought my laptop I had overheating issues right out the box. I did under-volt the CPU and the GPU, but that provided 5-10 °C degrees drop from 92°C – 98°C degrees.
It was idling in the the 70s °C.
Here are some numbers:
- Since brand new out of the box
- CPU Idle: High 70°C
- CPU Load: 92°C – 98°C – almost constant thermal throttling
- Intel UHD 630 GPU Idle: low 80°C
- Intel UHD 630 GPU Load: ~97°C
- After changing the thermal pads and the thermal solution
- CPU – No under-volt: 46°C – 49°C
- Idle: 42°C
- Load: 85°C
- Idle Average: 49°C
- Intel UHD 630 GPU no under-volt: 42°C – 64°C
- Idle: 42°C
- Load: 64°C
- Idle Average: 46°C
- CPU – Under-volt -135mV: 44°C – 72°C
- Idle: 44°C
- Load: 72°C
- Idle Average: 56°C
- Intel UHD 630 GPU with CPU under-volt: 42°C – 64°C
- Idle: 44°C
- Load: 58°C
- Idle Average: 50°C
- CPU – No under-volt: 46°C – 49°C
To me this is huge thermal improvement and is worth taking the whole laptop thermal system apart and replacing the thermal pads and the thermal compound. Especially with those bogus Acer thermal pads.
The laptop no longer gets hot to the touch unless I game or load it.
Test tools: HWiINFO and Intel Extreme Tuning Utility.
In addition to the overheating issue there’s one other issue – constant fan whine. Fans are running constantly no matter what you do.
It is just a BIOS overclock issue with almost all Acer laptops. Not sure why Acer and other manufacturers do not test and tune their expensive laptop clocks, but it is annoying.
In order to resolve this as we discussed earlier it is important to slightly undervolt the CPU.
Below I’m going to detail how this can be achieved easily.
Setting Automated Undervolting
on Acer Aspire V-Nitro VN7-793G Black Edition
While clean-up is important and contributes to the overall performance it is crucial to set the proper undervolt at boot time in order to resolve the jet engine fans of the Acer.
I’ve been using Quick CPU to monitor and set defaults for my CPU and GPU clock settings. Here I’m going to discuss how to underclock your CPU.
While many people use MSI Afterburner, I like Quick CPU much better.
Depending on your laptop you may not be able to set all settings, if your BIOS is fully locked.
My Intel i7-7700HQ is fully unlocked.
- Download and install Quick CPU
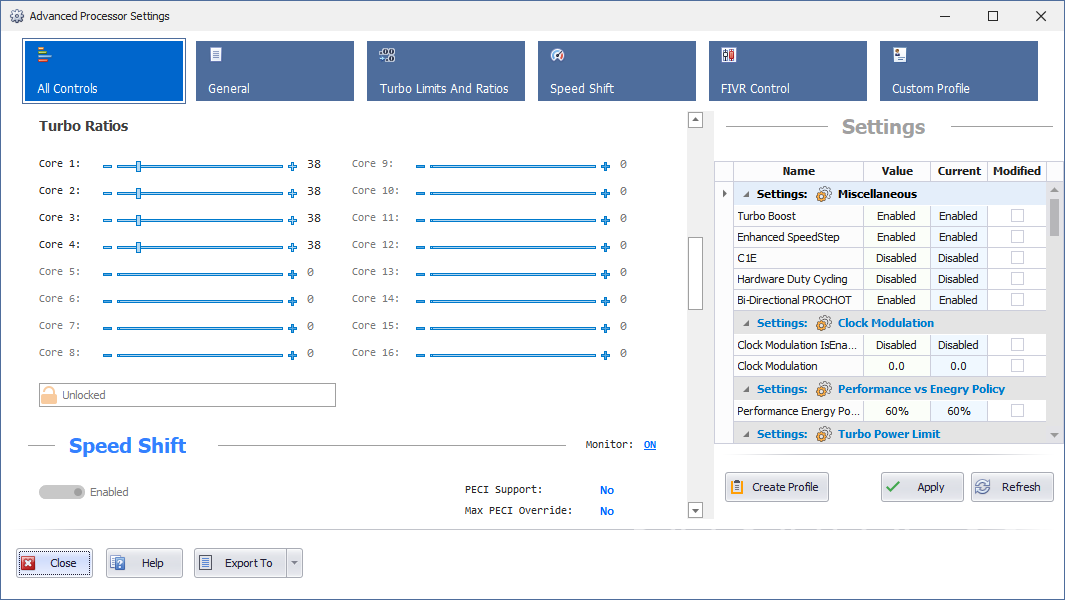
- Open Advanced CPU Settings
- Disable C1E power
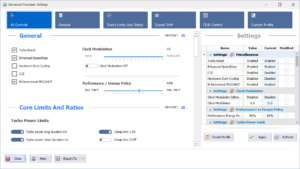
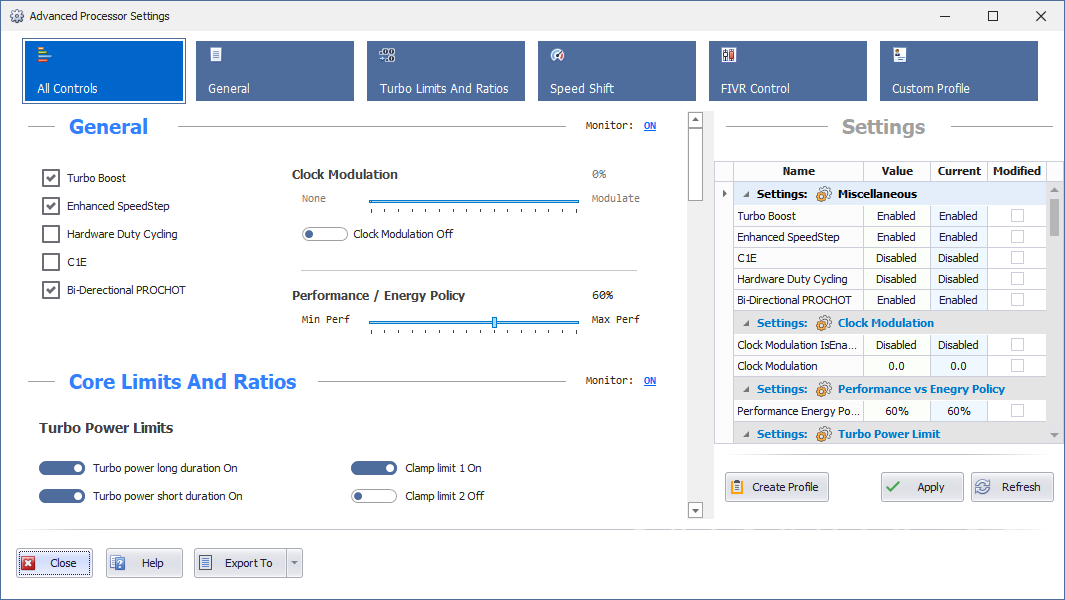
4. Make all Turbo Ratios equal, some cores could have lower ratio. DO NOT GO OVER THE HIGHEST RATIO!
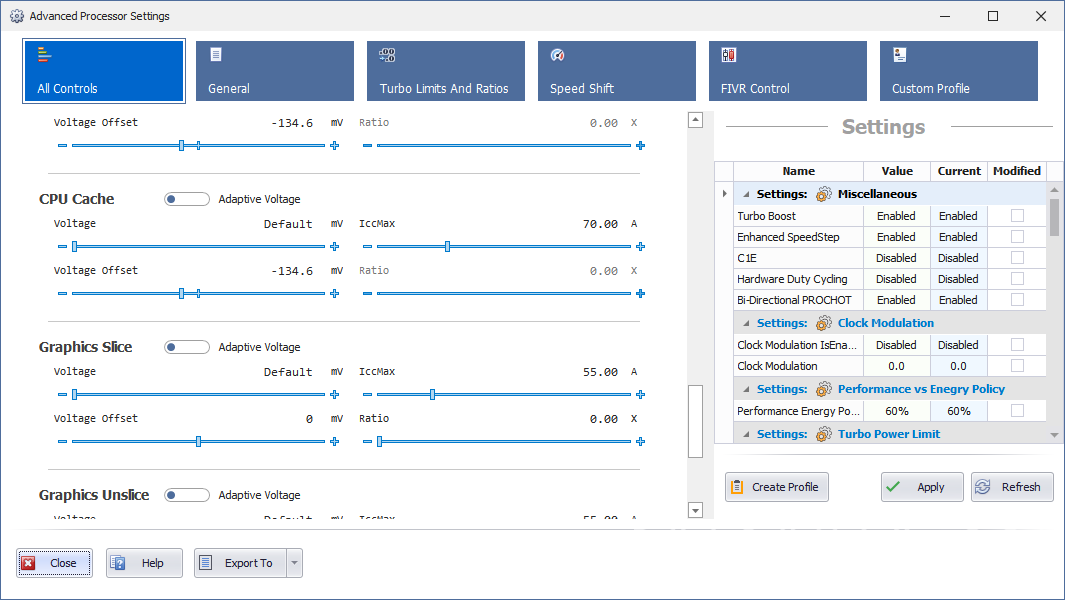
5. CPU Cache – Voltage Offset setting – this setting needs to go in the negative values. Mine is -0.135. This was the lowest stable setting value that wouldn’t crash or freeze my laptop.
I started at 0 decreasing the voltage by 10 until my laptop froze. Between my freeze at -0.140 and -0.135, I started going down by 1 value number until I found my stable clock at -0.135.
After you set your settings, make sure you create a new profile in the bottom right corner and make them start at boot.
To do that go to the “Custom Profile” menu option at the top right corner at “Advanced CPU Settings”. You will see your custom profile here. Click “Edit” and make applicable on start.
This will load your settings the next time your Quick CPU starts. I have set mine to start at boot.
Good Luck!
 (3 votes, average: 5.00 out of 5)
Recent Comments