Archive

Author Archive

Acer Aspire V-Nitro VN7-793G Heating and Thermal Heatsink Issue

June 30th, 2023 No comments

I’ve owned my Acer Aspire V-Nitro VN-793G-717 Black Edition since early 2017 and have been happy with it. It still runs all apps I need and does what I need it to do.

I do Photoshop, Premiere, After Effects, Blender and design and edits, light gaming – Counter Strike 1.6, CS GO, Just Cause 3, Age of Empires II Definitive Edition, etc.
I had no issues, except the overheating when gaming or overloading the computer.

Overheating was my only complaint.

Over the years I did some upgrades:

  • Main Drive – SAMSUNG 970 EVO Plus SSD 500GB NVMe M.2
  • Second (data drive) – Samsung SSD 860 EVO 1TB M.2 SATA in SATA III enclosure
  • Wi-Fi 6 module upgrade – Killer Wi-Fi 6 AX1650 Module – Dual Band, 2×2 Wi-Fi 6/11AX, Bluetooth 5.0, M.2/NGFF (Gig+)
  • New battery – year 3 and year 5 of ownership
  • RAM Upgrade to max 32GB (2 x 16GB Micron Tech. 16ATF2G64HZ-2G3H1 DDR4-2400 / PC4-19200).

Recently I started hearing rattling noise from my GPU fan of my  laptop and decided to get a new one and change it.

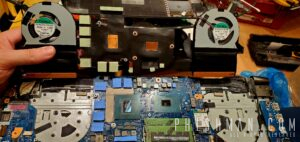
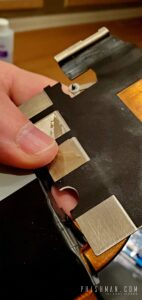
When I disassembled the laptop and removed the heatsink I saw that the thermal pads were baked and flaking. I started removing the pads and saw that under each thermal pad there’s thick plastic transparent foil that looked like double sided scotch-tape, but thicker separating the thermal pad and the brass heatsink.

I was shocked that Acer did this! That plastic is technically preventing the heat transfer and dissipation from the thermal pad to the brass heat pipe pads.

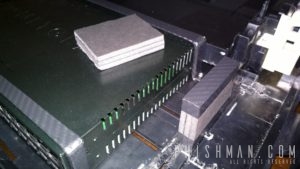
Flaking thermal pads and the plastic layer between the pad and the heatsink.

The plastic layer between the pad and the heatsink.


This is what the thick sticky tape-like plastic looks like.

This is what the thick sticky tape-like plastic looks like.


Baked VRM thermal pads.

Baked VRM thermal pads.


VRM thermal pads and the plastic tape that was between the heatsink and the thermal pad.

VRM thermal pads and the plastic tape that was between the heatsink and the thermal pad.


The replaced thermal pads before/after. Blue pads are the new thermal pads.

The replaced thermal pads before/after. Blue pads are the new thermal pads.


Yes, all that thick plastic was your thermal solution! Mind-blowing, Acer!

After removing all the useless OEM thermal pads I added the Sphinx Blue thermal pad that I got from Amazon.
I cut and sliced with a knife the thermal pad pieces that I needed and added to the VRMs.

Sphinx Blue thermal pad.

Sphinx Blue thermal pad.

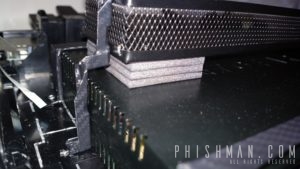
The outflow air ducts were filled with dust and other particles. Required a good cleaning. I had to remove the black plastic tape that insulates and connects the fans to the heatsink radiators in the back.
That allowed me to do clean inside the fans and the ducts.

99% Isopropyl AlcoholProlimatech Nano Aluminum Thermal Paste

99% Isopropyl Alcohol Prolimatech Nano Aluminum Thermal Paste

I use close to 100% isopropyl alcohol to clean the old thermal paste solution and any dust I can’t clean with a cloth.

The thermal paste I use is Prolimatech Pk-3 Nano Aluminum Thermal Compound  with Thermal Conductivity of 11.2 W/m-°C.
I’ve used Thermalright TF8 Thermal Compound Paste 13.8 W/mK, Carbon Based High Performance, Heatsink Paste and the ARCTIC MX-4 – Thermal Compound Paste, Carbon Based High Performance, Heatsink Paste.

I always come back to the Prolimatech as I see best results with that thermal compound.
The Thermalright was nowhere near the Prolimatech compound. CPU and GPU had 5-10 degrees higher difference under heavy load.
ARCTIC MX-4 performs good, but nowhere near the Prolimatech. I think it always has been overhyped product.

When I bought my laptop I had overheating issues right out the box. I did under-volt the CPU and the GPU, but that provided 5-10 °C degrees  drop from 92°C – 98°C degrees.
It was idling in the the 70s °C.

Here are some numbers:

  • Since brand new out of the box
    • CPU Idle: High 70°C
    • CPU Load: 92°C – 98°C – almost constant thermal throttling
    • Intel UHD 630 GPU Idle: low 80°C
    • Intel UHD 630 GPU Load: ~97°C
  • After changing the thermal pads and the thermal solution
    • CPU – No under-volt: 46°C – 49°C
      • Idle: 42°C
      • Load: 85°C
      • Idle Average: 49°C
    • Intel UHD 630 GPU no under-volt: 42°C – 64°C
      • Idle: 42°C
      • Load: 64°C
      • Idle Average: 46°C
    • CPU – Under-volt -135mV: 44°C – 72°C
      • Idle: 44°C
      • Load: 72°C
      • Idle Average: 56°C
    • Intel UHD 630 GPU with CPU under-volt: 42°C – 64°C
      • Idle: 44°C
      • Load: 58°C
      • Idle Average: 50°C

To me this is huge thermal improvement and is worth taking the whole laptop thermal system apart and replacing the thermal pads and the thermal compound. Especially with those bogus Acer thermal pads.
The laptop no longer gets hot to the touch unless I game or load it.

Test tools: HWiINFO and Intel Extreme Tuning Utility.

In addition to the overheating issue there’s one other issue – constant fan whine. Fans are running constantly no matter what you do.
It is just a BIOS overclock issue with almost all Acer laptops. Not sure why Acer and other manufacturers do not test and tune their expensive laptop clocks, but it is annoying.

In order to resolve this as we discussed earlier it is important to slightly undervolt the CPU.
Below I’m going to detail how this can be achieved easily.

Setting Automated Undervolting
on Acer Aspire V-Nitro VN7-793G Black Edition

While clean-up is important and contributes to the overall performance it is crucial to set the proper undervolt at boot time in order to resolve the jet engine fans of the Acer.

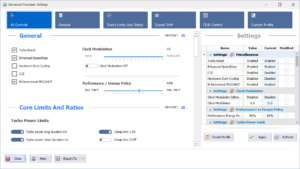
I’ve been using Quick CPU to monitor and set defaults for my CPU and GPU clock settings. Here I’m going to discuss how to underclock your CPU.
While many people use MSI Afterburner, I like Quick CPU much better.

Depending on your laptop you may not be able to set all settings, if your BIOS is fully locked.

My Intel i7-7700HQ is fully unlocked.

  1. Download and install Quick CPU
  2. Open Advanced CPU Settings
  3. Disable C1E power


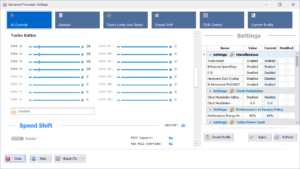
4. Make all Turbo Ratios equal, some cores could have lower ratio. DO NOT GO OVER THE HIGHEST RATIO!


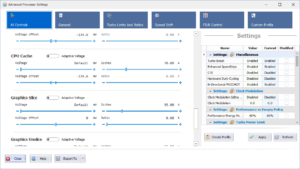
5. CPU Cache – Voltage Offset setting – this setting needs to go in the negative values. Mine is -0.135. This was the lowest stable setting value that wouldn’t crash or freeze my laptop.
I started at 0 decreasing the voltage by 10 until my laptop froze. Between my freeze at -0.140 and -0.135, I started going down by 1 value number until I found my stable clock at -0.135.


After you set your settings, make sure you create a new profile in the bottom right corner and make them start at boot.
To do that go to the “Custom Profile” menu option at the top right corner at “Advanced CPU Settings”. You will see your custom profile here. Click “Edit” and make applicable on start.

This will load your settings the next time your Quick CPU starts. I have set mine to start at boot.

Good Luck!
1 Star2 Stars3 Stars4 Stars5 Stars (1 votes, average: 5.00 out of 5)
Loading...

ARM-Based Web Cluster – Build Log Part 1

June 9th, 2017 No comments

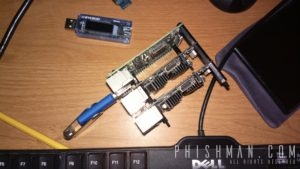
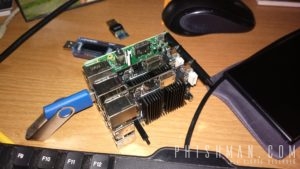
After doing extensive research on single board ARM-based computers I decided to build my own cluster. The purpose of the ultra low power cluster is to develop new applications with the most recent software technologies and host few production websites. Yes, I know, I’m crazy! 😀

My research showed that previous clusters lack significant calculating power and they’re based on performance limited (hardware) boards like Raspberry Pi 2, Raspberry Pi 3 and PINE A64+. The main problems with those boards are the RAM, the limited I/O of the microSD cards (limited to 25 MB/s on Pi 2 and Pi 3), and the network speed (10/100).
Those boards are more suitable to be used as development boards. Often microSD card speeds are limited to 25MB/s (on Pi 3), which means that even if you buy UHS-II and UHS-3 cards you won’t be able to utilize them at their full speeds.

I’ve looked closely at the ODROID single boards – those have powerful CPU (Quad and Octa-core A53 and A15), fast Gigabit network (10/100/1000) , 2GB RAM USB 3.0, eMMC support.

For my build I’ve chosen the following hardware

Parts and single-boards – www.ameridroid.com

Web and Caching Nodes:
ODROID-C2:


Web Server Nodes:
ODROID-XU4:

We benefit from faster more capable CPU, eMMC (up to 400MB/s capable eMMC5.0) speeds, USB 3.0, Gigabit network and 2 GB of LPDDR3.


Database Nodes:
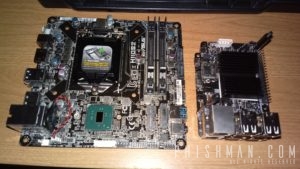
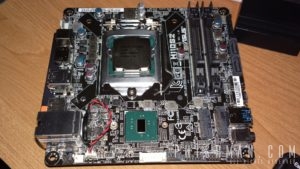
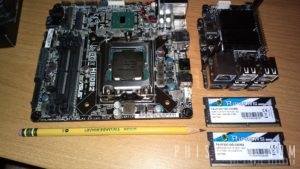
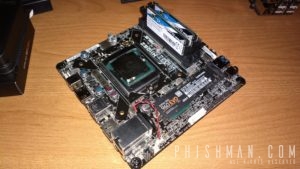
ASUS H110S2/CSM Mini-STX (Installing Percona With TokuDB MySQL Server)

For our cluster we will start with:

  • 1 proxy node
  • 2 load balancer nodes
  • 2 web server nodes
  • 1 database server node

Our final goal is a cluster with:

  • 1 proxy node
  • 2 cache nodes
  • 8 nodes in web cluster
  • 10 nodes in MySQL cluster and 2 nodes in NAS cluster. Total 23 nodes.

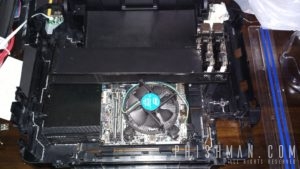
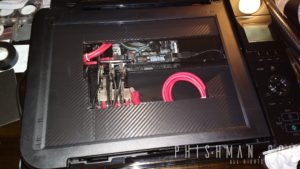
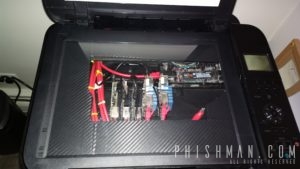
We may not be able to fit that many nodes in this printer case, because the power supplies needed to power all the nodes will require a lot of space.

Hardware Prices:
$90.75 – 2 x ODROID C2
$53.90 – 2 x 16GB eMMC Black Module C2 Linux
$133.05- 2 x ODROID-XU4Q with Passive Heatsink
$54.90 – 2 x 16GB eMMC 5.0 Module XU3/XU4 Linux (Blue Dot)
$20.15 – 2 x 5V/4A US Type Power Supply
$30.00 – 1 x Raspberry Pi B+
$39.00 – 3 x MicroSD Sandisk 16 GB UHS-I
$3 – 1 x Display flat cable 22 pin to 15 pin Pi (China)
$29.99 – 20 x 3 ft CAT6 patch cable – MAXIMM 3 Feet |20 Pack | Red| Snagless Cat6 Ethernet Cable With Cable Ties
$15 – 1 x SABRENT SSD Enclosure USB 3.0 EC-UASP
$20 – 2 x SABRENT SSD Enclosure USB 3.0 EC-UK30
$14.99 – 1 x KEEPING 5V/12A 5-Port USB Hub 60W Wall Power Charger Sation for Tablet, iPhone,Samsung Galaxy, Amazon Kindles, HTC, LG
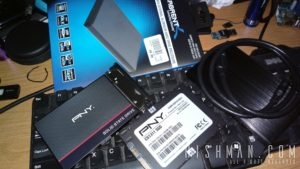
$100 – 2 x SSD PNY 120 GB
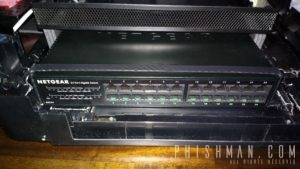
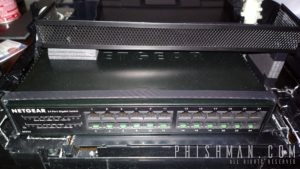
$74.36 – 1 x NETGEAR 24-Port Gigabit Ethernet Desktop/Rackmount Switch (GS324)
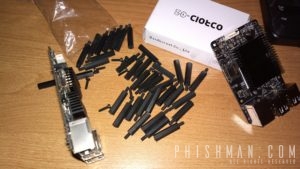
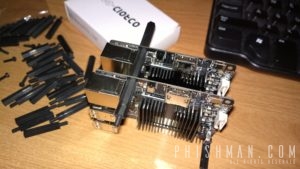
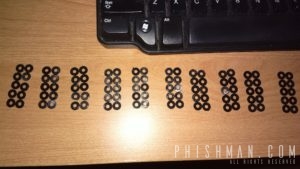
$8.63 – 1 x M3 25+6mm Male Female Thread Nylon Hex Standoff Spacer Pillar 50pcs
$8.90 – 1 x HOBBYMATE 180Pcs Assorted M3 Nylon Screws Nut Standoffs Spacers for DIY
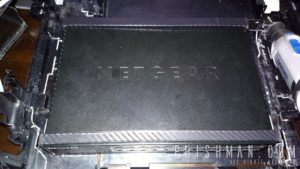
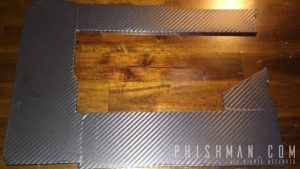
$5.89 – 1 x Orion 3d Black Carbon Fiber Vinyl Wrap – Outdoor Rated for Automotive Use – 12″ x 60″
$5.90 – 1 x Pwr+ Short 3 Ft 3 Prong AC Power Cord Cable Plug L-Type
$1.00 – 1 x Mesh organizer
$81.49 – 1 x ASUS H110S2/CSM LGA1151 DDR4 Dual GB LAN DP HDMI LVDS Mini-STX
$50.00 – 1 x Intel Pentium G4400 SkyLake 3.3 GHz LGA 1151 Boxed Processor (for BIOS update)
$50.00 – 1 x Intel Pentium G4560 Kaby Lake 3.50GHz LGA 1151
$216.98- 1 x G.SKILL 32GB (2 x 16G) Ripjaws Series DDR4 PC4-17000 2133MHz Laptop Memory Model F4-2133C15D-32GRS
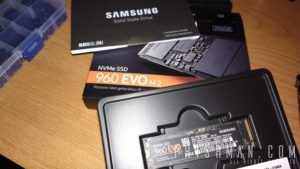
$135.00- 1 x Samsung 960 EVO Series 250GB NVMe M.2 Internal SSD
$26.56 – 1 x Oneda 120W 19V 6.32A AC Power Adapter Laptop Charger for Asus
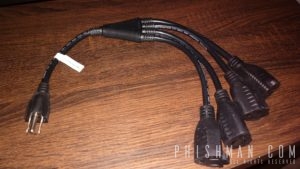
$14.99 – 1 x Cable Matters (2-Pack) 4-Outlet AC Power Cord Y-Splitter – 1.5 Feet
$7.99 – 1 x HUACAM HC05 3 Pack USB to 5.5 mm/2.1 mm 5 Volt DC Barrel Jack Power Cable
TOTAL: $1292.29

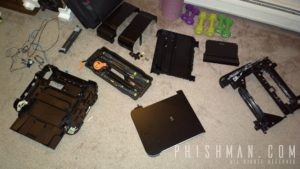
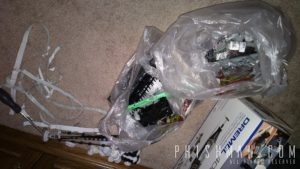
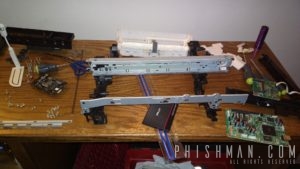
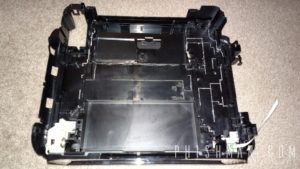
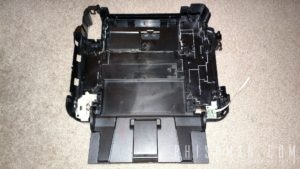
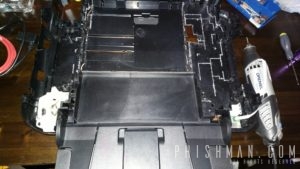
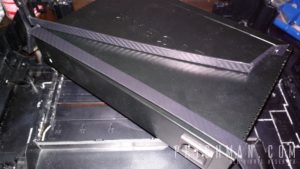
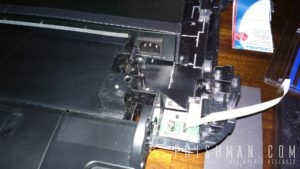
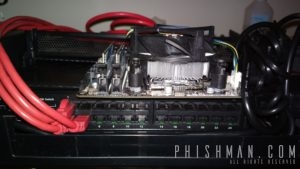
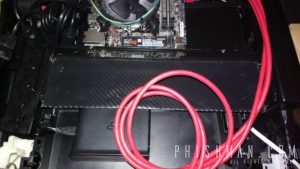
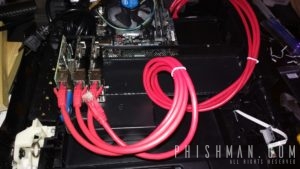
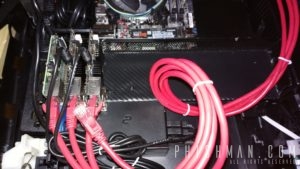
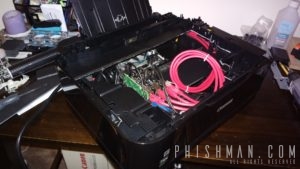
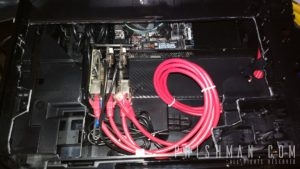
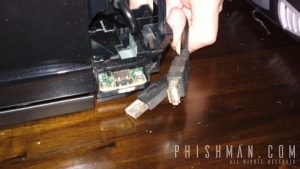
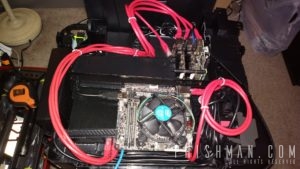
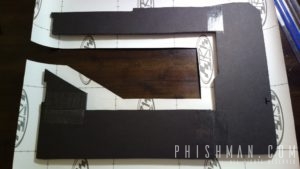
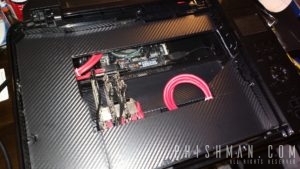
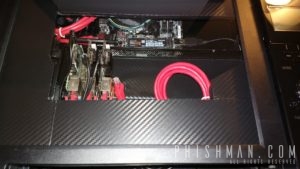
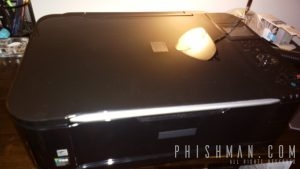
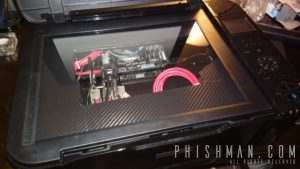
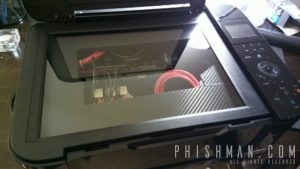
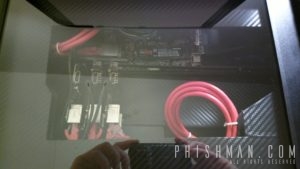
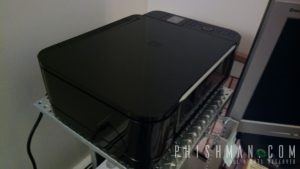
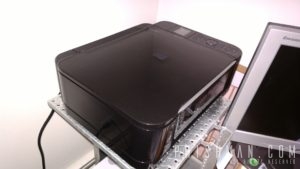
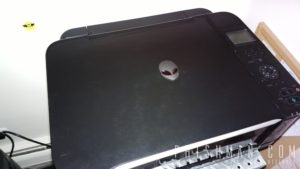
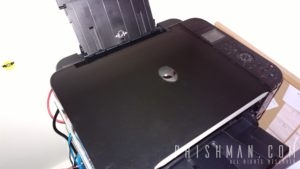
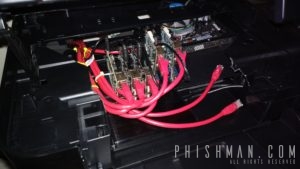
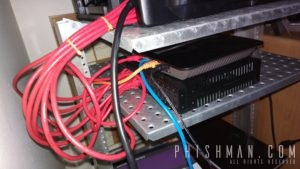
Case enclosure used is old broken Canon printer, which I liked for the project.


Building


1 Star2 Stars3 Stars4 Stars5 Stars (6 votes, average: 4.33 out of 5)
Loading...

Installing TokuDB Storage Engine on Percona MySQL Server

June 8th, 2017 2 comments

I was installing TokuDB Storage Engine on Percona 5.7 Server based on this Percona guide, when I realized that there’s no my.cnf file.

You are still able to configure the server and install plugins from within the MySQL CLI.

Tech Specs:
OS: Debian Jessie
RAM: 32 GB
CPU 2 Cores, 4 Threads
Storage: SSD NVMe Samsung 960 Evo

More about the server:
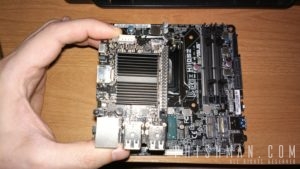
This little MONSTER is amazing!

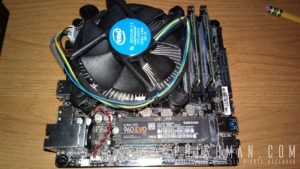
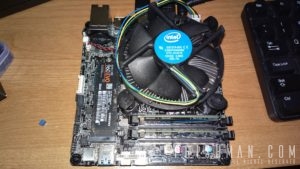
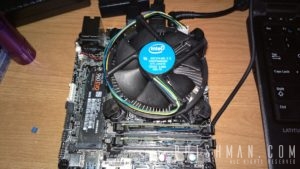
I have it paired with Intel G4560, 32 GB DDR4 G.Skill Ripjaws (2 x 16 GB) and M.2 Samsung Evo 960 250GB. Installed Debian Jessie server edition (with latest kernel) and did SSD read/write benchmark. It does 1.7 GB/s write and 3.8 GB/s read of 1 GB file. Insane!!!
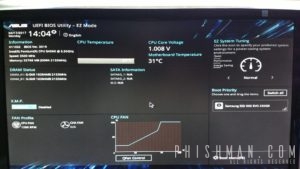
Stock CPU fan – CPU 32C, motherboard 34C degrees. Under load 38-40C max!

I had to buy Skylake CPU (Intel G4400) to update the BIOS for the Kaby Lake (Intel G4560) support. It’s LAME! Those manufacturers must integrate USB flashing by default as a basic functionality! If I had time I would send the motherboard back or just return it. Unfortunately I had no time to ship my motherboard for BIOS update. It was in the product description that it supports 6th Gen Skylake CPU, even on ASUS’ website it was clearly stated that it needs BIOS update, so it’s not something that I didn’t know. It still is the best, smallest STX motherboard!

I would highly recommend and I would buy AGAIN this little monster board! I hope it stays sharp and fast!
I’ve been waiting for an STX form factor for years. It’s dream come true! 🙂

Thanks crazy awesome ASUS! 🙂

Here’s how to do it:

  1. Installing Percona Server on Debian and Ubuntu (Official)
  2. To avoid “ERROR 1123 (HY000): Can’t initialize function ‘TokuDB’; Plugin initialization function failed”, you need to disable Kernel Transparent Hugepages for TokuDB, if not disabled.
    Here’s how to check:

    It should return something like:

    If it’s not set to never, you can do:

    Reboot.
    Test again after boot:

    Now it should be:

     
  3. Dependencies
    You need libjemalloc library installed. Quick and simple installation:

     
  4. Install The TokuDB Engine

    Test to check, if the TokuDB storage engine was successfully installed do:


That’s it. Enjoy! 🙂

Feel free to shoot me a message in the comments.


1 Star2 Stars3 Stars4 Stars5 Stars (4 votes, average: 4.00 out of 5)
Loading...

The Long Waited AMD Zen CPU – Countdown

January 3rd, 2017 No comments

It’s January 2017 and so many people are waiting for the new AMD CPU release. In matter of fact, I was configuring different low end (cheap) platforms to upgrade my current PC to. No GPU is included in those configs for giving a chance and personal choice to choose from between FreeSync and G-Sync monitor per person’s desire and appropriate GPU.

With what’s being promised by AMD and the new RYZEN CPU, I can wait few more weeks. Hopefully they keep their promise this time.

The new CPU is promised to deliver extreme performance and same TDP over previous AMD CPU releases. It’s said to be much faster than previous AMD CPUs, based on 8-Core 16-Threads chip. The new chip will be better in design than the Bulldozer based CPU.

According to some rumors the release of the new chip is being delayed, because the production of the new chipset is being delayed. Hopefully anything that delays the release is being resolved sooner, so we can all enjoy new AMD CPU, hardware, performance improvement and Intel price breaks.

I would really love to own new Ryzen based system.

I will update this article and my upgrade plans during Q3 2017.

2017-01-05 update: AMD announces X300 and X370 AM4 chipset motherboards for Ryzen processors
The “Zen” Core Architecture

2017-01-06 update: AMD ZEN 8-core Summit Ridge To Launch January 17th 2017 (Guru3D)
It seems that we might have an actual date for the new AMD ZEN release.

2017-01-09 update: AMD will not do paper launch. The new ZEN CPUs to arrive in January and lower segment in March 2017.
AMD claims that the ZEN architecture will have 4 years roadmap.

Zen SR7
Zen SR7
Zen SR5
Zen SR3
L2 Cache
 4MB 4MB 3MB 2MB
L3 Cache
 16MB  16MB 12MB 8MB
Cores
 8  8 6 4
Threads
 16  16 12 8
Power
 95W  95W 65W 65W
Core Clock
 3.2GHz  3GHz TBA TBA
Turbo Clock
 3.5GHz  3.2GHz  TBA TBA
MSRP
 $499  $349  $249 $149
Launch
 January  January March March

Please note that none of this information is official and it might change at any time without notice.

2017-02-23 update: AMD RYZEN pre-order available. Official sales launch March 2, 2017.
Now everyone can pre-order RYZEN CPUs. Find the list at AMDs communication press release here. For international pre-order visit this page.

2017-03-02 update: AMD RYZEN goes on SALE! 🙂


The best AMD Ryzen deals in March 2017

AMD Ryzen 7 1700 65W 8 Core 3.7GHz: This 8-core processor comes with a base clock of 3GHz and a turbo clock of 3.7GHz, as well as an unclocked multiplier for manual overlocking and AMD’s Wraith Spire cooler for only $329 from Amazon

AMD Ryzen 7 1700 65W 8-Core 3.7GHz: NewEgg isalso offering the very same Ryzen 7 1700 CPU deal for pre-order. It also comes with the Wraith Spire CPU cooler with red LEDs for the same $329 on NewEgg

AMD Ryzen 7 1700X 95W 8-Core 3.8GHz: This ‘X’ version of the Ryzen 7 1700 comes with automatic XFR overclocking, which based on the CPU cooler you use, will automatically overclock the CPU so that you get the maximum performance out of it. This CPU is sold without a cooler, so you’ll need to make sure you buy one separately. It’s going for only $399 on NewEgg

AMD Ryzen 7 1800X 95W 4.0GHz: AMD’s flagship Ryzen CPU, the Ryzen 7 1800X is an absolute beast, and has already broken overclocking world records. Best of all, the price is still pretty reasonable considering the pure power you are getting here. Get it for just $499 on Amazon

1 Star2 Stars3 Stars4 Stars5 Stars (4 votes, average: 4.00 out of 5)
Loading...

InstantFox Address Bar Workaround

December 23rd, 2016 5 comments

I love using InstantFox and I’ve been missing InstantFox so much that I started looking for way to fix InstantFox or find a workaround to the address bar not working issue since Firefox version 50.

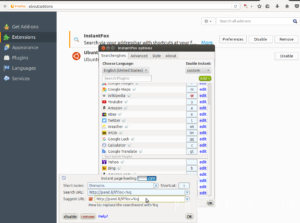
Easy workaround is to add another search option with keyword of your choice. So anything that is location that you don’t need to search (e.g. domain name), you can use that assigned URL with your keyword.

Here’s how to do it:

  1. Click “Add+”.
  2. Enter your desired custom “Short Name”.
  3. Define desired “Shortcut”, I use “s” as my shortcut.
  4. In search URL enter the following:

http://pand.li/if?loc=%q

In “Suggest URL” leave blank as it won’t load any suggestions on domains.

This will redirect/load any other URL that is not a search website.

I usually enable “Take suggested result on enter” in the “Advanced” tab. That way, if I Google something, it always redirects me to the Google search results page.

In some OSes like Ubuntu 12.04 for example I couldn’t get the InstantFox to add new or modify existing bookmark (shortcut). The only way, that I found works is to go to “Add-ons” in Firefox and edit the plugin preferences from there.

See the image on the left with my settings. Now always I type “s myadress.com” the browser will take me to the myaddress.com URL or any other that I define, starting with keyword “s”.

Here are their terms of use for the InstantFox redirects: http://pand.li/if?terms

I love InstantFox, but there’s no more support for it. 🙁

I’m thankful for this workaround, so I thought to share…

1 Star2 Stars3 Stars4 Stars5 Stars (4 votes, average: 4.00 out of 5)
Loading...

MicroSD as Memory Stick Pro Duo For Sony Photo Camera

December 20th, 2016 7 comments

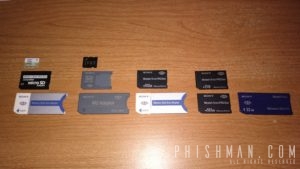
On the picture above – my memory cards and on the most left the microSD with the adapters.

Recently I started shooting in RAW format with my DSC-R1 photo camera and I started needing much more space for my photos. I started looking for new 32 GB memory card, but buying 32 GB Sony Memory Stick Pro-HG Duo is $57.99 and way too expensive than I expected.

I searched for alternatives to the Memory Stick Pro Duo and found that there are Memory Stick adapters for microSD cards, which work pretty well. I found Micro SD SDHC TF to Memory Stick MS Pro Duo for $1.32 and bought two. Arrived in less than a week and it looked and felt as expected.
The adapter states that it is SDHC and supports up to 32 GB microSD cards, but I tested 64 GB PNY UHS-1 microSD card and it worked with my Sony DSC-R1. So it does support SDXC cards.

Memory Stick PRO Duo Compatible microSD Adaptor

You can find more about SD, SDHC, SDXC cards here.

I ended up pairing the this cheap adapter with 32 GB Lexar Professional 1000x microSDHC 32GB UHS-II/U3. Reads and writes feel much faster than my old card. My photo camera recognized the card as it does any Memory Stick PRO Duo. Now my photo camera enjoys fast card with huge capacity.

I performed test for accessing taken pictures in RAW format at 10 MPx on my Sony DSC-R1 with three different memory cards. Below are the results:

512 MB Sony Memory Stick PRO Duo – capacity 96 normal photos and 18 in raw format / raw access time avg. 5s.
1 GB Sony M2 Duo – capacity 189 normal photos and 36 raw format / raw access time avg. 1s.
32 GB Lexar Professional microSDHC 32GB + Memory Stick PRO Duo Adaptor – capacity 6267 normal photos and 1213 in raw format / raw access time avg. 1s<.

I don’t like benchmarking my memory cards for read and write speeds, but I bet the card is on par with what it’s stated to read and write as speeds.

32 GB Lexar Professional microSDHC 32GB UHS-II/U3 [Amazon.com benchmark]

So this adapter saved me $37 and is paired with much faster card than the Sony Memory Stick PRO Duo. I’m excited to do my first full photo shooting with the new memory card.

1 Star2 Stars3 Stars4 Stars5 Stars (19 votes, average: 4.58 out of 5)
Loading...

Choosing Web Based CRM

December 4th, 2016 3 comments

Recently my management tasks started getting out of control. Need arises for using a CRM platform in my day to day business tasks as they started becoming unmanageable. Organizing management tasks and following up with organizations and contacts became unpleasant using just simple MS Office products.

I will shortly overview the products I’ve chosen.

I need something more business oriented. That has been made for this purpose.

Here are some major requirements for the software:

  • Web based
  • LAMP stack technology

CRM functional requirements:

  • Tasks
  • Campaigns/Projects
  • Accounts
  • Contacts
  • Opportunities
  • Leads
  • Marketing
  • Products
  • Reports
  • Email/Inbox

After searching the web for any PHP based open source CRM platform, I narrowed down the list to the following products:

  • Zurmo
  • vTiger
  • EspoCRM
  • Fat Free CRM
  • suiteCRM

In the table below is a visual comparison of the functional requirements for the chosen products.
The product versions are as of today 2016-12-04. I don’t have the time to go and make a screenshot of each one of them.
crm-dec-04-2016-21-23-16


The color shading in the table displays my CRM preference based on the product testing I performed and the way I felt about each product. The darker the highlight the better I liked it.

suiteCRM

Initially I liked the features listed on their website, but once I stated testing suiteCRM I realized that the functionality isn’t quite there. What really was a no-go for me is the big fat interface, why would I need so big fields and confusing menu organization? Theme color contrast between the objects also were not chosen wisely.

Fat Free CRM

This CRM can cover pretty basic needs of your day to day tasks. Not what I really need. The interface is clean, but not on par with today’s website modern look and feel.

EspoCRM

This one was a tough one. I loved the rich functionality list and settings you get with Espo, but that interface tough, it’s just pushing me away!
Some of the “Create” options of the functionality menu list is sooo confusing. No explanation, just some option that you need to guess what it does.
That ugly search box on each page really bothers me.

vTiger

Feature rich interface, well organized menu and full set of options. The interface is clean and well organized.
Still I felt a bit confused by the functionalities. Also the search box at the top of each page was a no go for me.

Zurmo

Zurmo looks like it does have everything I need and the interface is lovely. Feature rich, well thought CRM with lots of geeky set of tools. The interface is not intrusive, clean and does have well organized menu.

It just wins in all features I need. The “Web Forms” is just a bonus.


Conclusion

It is up to you to decide what you need and like for your needs and day to day tasks.
In the table above I have created at the end short rating from 1 to 10 and the total rating of each product. Hope it helps.


UPDATE [2016-12-09]

Unfortunately, Zurmo is returning a bunch of errors. I tried troubleshooting the problem, but I couldn’t get it running. I spent 3-4 days reading in their support articles about this problem.

Warning: include(SecurableModule.php): failed to open stream: No such file or directory in /home/user/yii/framework/YiiBase.php on line 432
Warning
: include(): Failed opening ‘SecurableModule.php’ for inclusion (include_path=’.:/home/user/app/protected/extensions/phaActiveColumn:/home/user/app/protected/modules/api/tests/unit/forms:/home/user/app/protected/modules/api/tests/unit/models:/opt/lampp/lib/php’) in /home/user/yii/framework/YiiBase.php on line 432
Fatal error: Class ‘SecurableModule’ not found in /home/user/app/protected/modules/zurmo/ZurmoModule.php on line 38

I disabled the Memcache as per their advice, but it didn’t work. I tried tracking this myself in the code, but I get a bunch of ther errors. So I fix one problem and another occurs.

No product should be this complicated to install and run. I believe that if you have clean and simple, well thought code the web app should be pretty fast even without caching.
Goodbye Zurmo!

vTiger is next!

1 Star2 Stars3 Stars4 Stars5 Stars (8 votes, average: 3.63 out of 5)
Loading...

Router Reboots After Adding New Device

January 2nd, 2016 2 comments

I had a problem with my router (D-Link DIR-655) when introducing a new wireless device to the network. I found this to be caused by the automatic transmission rate setting in my router.

I did search everywhere for any kind of information about this problem without success. No one could tell where exactly was the problem coming from. I found other people reporting the same problem with other router makes and models.

Here’s how I will explain the problem.
When connecting different devices with different wireless adapter capabilities the router is trying to find the best and fastest for all devices transmission rate when set to auto. After choosing new transmission rate setting the router needs to be reloaded. In most cases this will not affect your wired connected devices, but only your wireless. In some cases might have to reboot the whole system, which will lead to network downtime.

How changing the “Transmission Rate” affects my router?
For example on a 54 Mbps router, changing the Transmit Rate allows the device to work at a specific speed for wireless transmissions.  The default Transmit Rate is usually Auto with a range of 1 to 54 Mbps.

To solve this problem you need to define custom transmission rate.

In the D-Link Router (D-Link DIR-655) Firmware (Hardware Version: B1; Firmware Version: 2.11NA) this is located in “SETUP” > “Wireless Settings” > “Manual Wireless Connection Setup” > “Transmission Rate”.

Change it to different option value, save, reboot and test it out.

1 Star2 Stars3 Stars4 Stars5 Stars (6 votes, average: 3.67 out of 5)
Loading...

The Best Camera & Podcast Phone With Digital Dolby Plus

May 26th, 2015 No comments

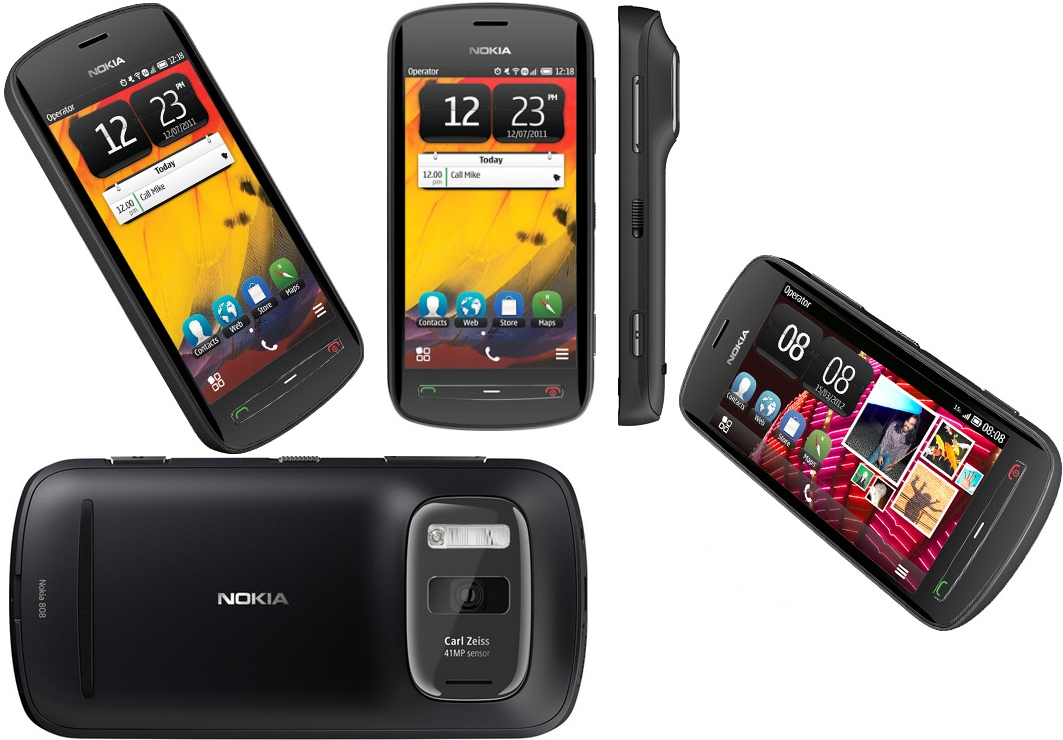
nokia-808-pureview-masterdevAfter three years since I posted about Nokia 808 PureView on my blog my Nokia N8 died and I recently bought the Nokia 808, so I thought to continue with my blogging about this camera, audio beast.

I won’t hide it, I am a Nokia fan, it is obvious. But not with today Nokia, but the real deal – the Symbian Nokia. Let’s get this straight, I don’t write the below lines because, I am a Nokia fan but because I do care about quality not apps quantity with mediocre hardware.

This is THE BEST CAMERA PHONE EVER as of May 2015!
WARNING: Not your average gadget! This is a MUST HAVE gadget! Especially now when it’s under $200 (from $700), buy until there are still quantities!

I don’t write long and descriptive reviews about a lot of products on websites, but this is my review for an extreme quality cell phone.
I will not repeat someone else’s reviews or comments, I will just write few words about the product that are important to me and share a pretty big list with bookmarks to resources, I found helpful for choosing this amazing device. Then you decide for yourself!

Product:
Nokia 808 PureView Unlocked GSM Phone with 41MP Camera with Carl Zeiss Optics and Symbian (Belle FP2) OS – Black
Support for Nokia 808PV support continued until the end of 2017 (what I heard).

Accessories:
1. ArmorSuit MilitaryShield – Nokia 808 PureView Screen Protector Shield + Black Carbon Fiber Film Protector & Lifetime Replacements (Amazon)
2. CellCase Octopus style Portable Adjustable Tripod Stand with Retractable Holder for Apple iPhone 3G 3GS 4 4s iPhone 5 5c 5s Samsung Galaxy s3 i9300 s4 (Amazon)
3. ( Black + Earphone ) LG G3 stylus Protective Stylish Fitted Faux Magnetic Button Pull Tab Pouch Skin Case Cover With Premium Quality in Ear Buds Stereo (There are no leather cases for Nokia 808 that I like, so I went with LG3 one). (Amazon)
4. Jetpack Battery Pack, 5100mAh (http://wordpressswagstore.tictail.com/product/jetpack-battery-pack).

As I saw in some previous reviews, this is the old extreme high quality build phone from Nokia (quality matters for me, not some mid-range, mediocre phones like Samsung galaxies, iPhones or HTCs, etc. with most of their low end hardware).

The phone quality is as always the best, beautiful, different as it is in all Nokia phones before. I love heavier phones with extreme quality hardware as we had in Nokia N9, N8, E7, N97, N96, N95, N90, N86, N85, E63… .. . 3310 🙂
But this model exceeds the hardware quality in any previous models (and in most current ones) – camera, sound, GPS, etc. (on that later).

PROS:

Camera:
41Mpx sensor, should I say more?
This is one of the best photo and video cameras I’ve ever owned on a cell phone. It easy exceeds my Sony DSC-R1 and Sony Cyber-Shot DSC-HX100V 16.2 MP Exmor R CMOS, the Nokia 808 phone camera is easy comparable to Canon EOS 5D Mk III, Nikon D800 and Sony Alpha 85/77 photo cameras in some cases exceeds color and clarity of the photo cameras. (See links at the bottom)

Live like colors, excellent sharpness and detail! Tweakable settings, few different point and shoot modes, PureView (PV) technology (the best on this phone only). Colors not over saturated and pumped up and you still have control over that. No matter which resolution you choose 2Mpx, 5Mpx, 8Mpx, 34Mpx it does a great photos at any resolution!
Beautiful HRD photos with 41Mpx sensor: http://smartcam.club/node/2983 (See links at the bottom)

Video at 1080p is live like, detailed and beautiful! (see for yourselves: https://www.youtube.com/watch?v=0Iy6QSQCCUo turn on the 1080 quality)

Audio, Sound and Podcast:
This is the part I’d like to discuss in more detail. I do podcast and this is a great device to have at any time in my pocket, when I meet new people, go to conferences decide to interview someone on the go, I just pull out my phone, my juice pack and start audio recording at any place, any time, any situation I’d like. The audio recorder is there always for me. The audio quality is the highest possible with high quality hardware (huge mobile audio chip). On the go, I have surround sound capable system with Rich Recording Stereo Sound with Dolby Digital sound quality. (See links at the bottom)
Rich Recording Stereo Sound technology, in development since 2007, was called Rich Recording, made possible by the special mics that Nokia created alongside its partners, which could take a sound pressure up to four times stronger than your average phone microphone. They are called High-Amplitude Audio Capture (HAAC) mics, and solve the typical disadvantage that the tiny diaphragm of your run-of-the-mill handset microphone has – to avoid clipping the sound at high 120 dB levels, which introduces distortion, a high-pass filter gets applied, which makes the sound very thin, as the low frequencies become non-existent.

GPS:
As with all Nokia Symbian devices the Nokia 808 PureView comes with Nokia Maps Suite, with free global, offline maps from NavTeq, voice guidance with text-to-speech street names, live traffic updates and speed limit and safety camera warnings.
The Suite includes the basic Maps app which provides either walking navigation, or switches to the Drive app for vehicular Sat Nav functionality.

Destinations can be found by text searching, Point of Interest (POI) browsing, location selection from the map screen or direct integration with the Contacts app.
Other apps within the Maps Suite are Weather, Guides and Map Loader which each do what their names imply.

The final two apps are Check In, which provides locational geo-status updates, and Public Transport, which provides scheduled public transport information for 87 cities around the world.

GPS acquisition is fast and GPS fix is stable with the help of Assisted GPS, Wi-Fi/Network and Network Based Assistance.

A little testing proved that even with all assistance turned off the fix was still stable although, as expected the initial acquisition took longer.

Settings:
Setting up GPS (enable), location tracking, connectivity and priorities for connection types takes a bit more than any other, but it’s all great ones it is setup. In order to use all that you need to manually enable it. Which is the way I like it anyway. That way, I know what is working and how it is working.

Coverage and call quality:
Nokia (Symbian) never had any issues with connecting you at any place at any time with a good carrier. Sound quality during call can’t get any better. Clear, loud sound that is easy understandable with the best coverage possible. Any Nokia user that had different phones will tell you the difference in the phone call quality.

HotSpot:
Easy to create a hotspot with Nokia 808 and JoikuSpot.

Battery:
The Symbian OS is one of the most efficient, lightweight OS in the world. Nokia uses single core, battery last days, and that is because the OS has the most efficient OS.
So far I take 2 full days of usage with web browsing, few photos per day, podcasting and music listening.
CONS:
– No up to date apps (not a problem for me and my device usage, I am not an app junkie). If you want to be up to date with all market apps go with Android phone!
– Discontinued for now OS, end of support in 2017.

Still in doubt? See the links below…

LINKS:

Device:
– Official Nokia 808 PureView Documentation: http://download.fds-ncom.nokia.com/supportFiles/phones/files/guides/Nokia_808_UG_en.pdf
– Full tech details: http://www.gsmarena.com/nokia_808_pureview-4577.php

Video & Photo:
– Video at 1080p: https://www.youtube.com/watch?v=0Iy6QSQCCUo (turn on the 1080 quality)
– The world of the big – Nokia 808 PureView vs Canon EOS 5D Mk III vs Nikon D800 vs Sony Alpha 85/77: http://mynokiablog.com/2012/06/18/nokia-808-pureview-vs-canon-eos-5d-mk-iii-nikon-d800-sony-alpha-8577
– Mystery Camera Revealed: Nokia 808 PureView Test Shots in the Face-Off (Nokia 808 PureView vs Canon EOS 5D Mk III vs Nikon D800 vs Sony Alpha 85/77): http://www.digitalversus.com/mobile-phone/nokia-808-pureview-p13536/mystery-camera-revealed-nokia-808-pureview-test-shots-face-off-n24775.html
– Nokia 808 PureView ushers in a revolution in smartphone imaging: http://company.nokia.com/en/news/press-releases/2012/02/27/nokia-808-pureview-ushers-in-a-revolution-in-smartphone-imaging

Audio Recording & Dolby Digital Plus Sound:
– Nokia 808 PureView Rich Recording Stereo Sound: http://lumiaconversations.microsoft.com/2012/03/23/nokia-808-pureview-and-nokia-rich-recording-brings-true-stereo-sound
– High Quality Recording in Nokia Phones: http://i.nokia.com/blob/view/-/3160090/data/1/-/High-quality-audio-recording-in-Nokia-Lumia-smartphones.pdf
– Dolby and Nokia putting Hollywood magic in your hands – and ears (Nokia 808 PV): http://lumiaconversations.microsoft.com/2012/05/04/dolby-and-nokia-putting-hollywood-magic-in-your-hands-and-ears
– Dolby Showcases New Nokia Smartphone at MWC: http://investor.dolby.com/releasedetail.cfm?releaseid=651541

– Nokia 808 on Wikipedia: http://en.wikipedia.org/wiki/Nokia_808_PureView

1 Star2 Stars3 Stars4 Stars5 Stars (5 votes, average: 3.60 out of 5)
Loading...

Debian – “SIOCSIFFLAGS: Operation not possible due to RF-kill”

January 24th, 2014 1 comment

Okay,

Here’s how I fixed this::twisted:

After trying all the options (which didn’t work) I decided to put back the original HDD that I have for the laptop with Win7. After booting the Win7 I did:

Code: Select all
1. Open the device manager
2. Found my wireless adapter, then right click disable and again right click uninstall and checked the checkbox "Remove drivers"
3. Uninstall all drivers, Reboot, Install Drivers, Reboot
4. After the boot the system recognized my Wifi
5. Click the windows balloon at the bottom right corner and choose "Install Automatically" - this way Windows finds the driver online and it downloads the correct one by itself.
6. My ASUS have Live Update software - looks like this http://www.notebookcheck.net/fileadmin/_migrated/pics/Asus_live_update_01.gif (not mine on the screenshot!). After opening the Asus Live Update it automatically recognized that there's an update, checked the required update and clicked "Install"
7. Reboot
8. Wireless is back ON!!!

:lol:

Next… Switching hard drives, removed the original and installed the new SSD with the Debian. I made an update over the LAN, then upgrade, removed some junky drivers which I tested with before and couldn’t get working and left only the Atheros Firmware. Works Perfectly! :mrgreen:
I spent may be 2 weeks and reinstalled Debian and Ubuntu over 20 times, including compiling my own Kernels, trying to figure out what was wrong… I even torn apart the whole laptop to check what’s the exact model of the Wi-Fi and check if everything was installed correctly. I was about to buy a new mini PCI Wi-Fi adapter…
Under Linux is a no go. I found may be over 100 people having the same issue and different geeks and experts were suggesting 1000 different approaches which didn’t work for me, neither for them. Few people said that they fixed it under Windows. Worked for me as well. If you have such problem just switch back to Windows and let it do it’s work! Finally something useful from Windows :lol:
I thought that there was something wrong with me and I was about to grab the hammer, but it seems that the keyboard shortcuts in combination with the firmware and the power switch (which I assume I was playing with) broke the Wi-Fi capability. I guess there’s a Kernel problem, which needs some SERIOUS fix!
But hey, it’s up and running now. :mrgreen:
Finally I can install my web development work environment and have fun! YAY!!! :mrgreen:

Oh Forgot! After all the crap, my laptop didn’t connect to the router (D-Link DIR-655), sooo I decided to upgrade the firmware :lol: aaand my router was a brick after the upgrade :lol: Another 2-3 hours… research, firmware upgrades… hard resets… :shock: But this is the tutorial http://www.dslreports.com/forum/remark,14090809 that helped me! Now I’m running the latest firmware and that fixed my laptop Wi-Fi connectivity issue. :mrgreen:

Here’s my full post on the Debian website: http://forums.debian.net/viewtopic.php?f=30&t=110718

1 Star2 Stars3 Stars4 Stars5 Stars (4 votes, average: 4.00 out of 5)
Loading...